Moving to Markdown
A website update
I'm writing this only for those who follows this blog via RSS feed and probably wonders why they had many notifications on their RSS reader. Sorry, this thing happen when upload a new version of my website. So, what's new on this new website? Not much, nothing changed visually... But everything changed under the hood!
I made a pretty big change: I modified the way article are stored by default by the Content Management System I use: PluXML. I use it to power my blog since more than a decade. Now this one works with markdown files and it wasn't a little task: I had 500 articles created with various WYSIWYG editor and stored as HTML minified and stored into a XML flat files.

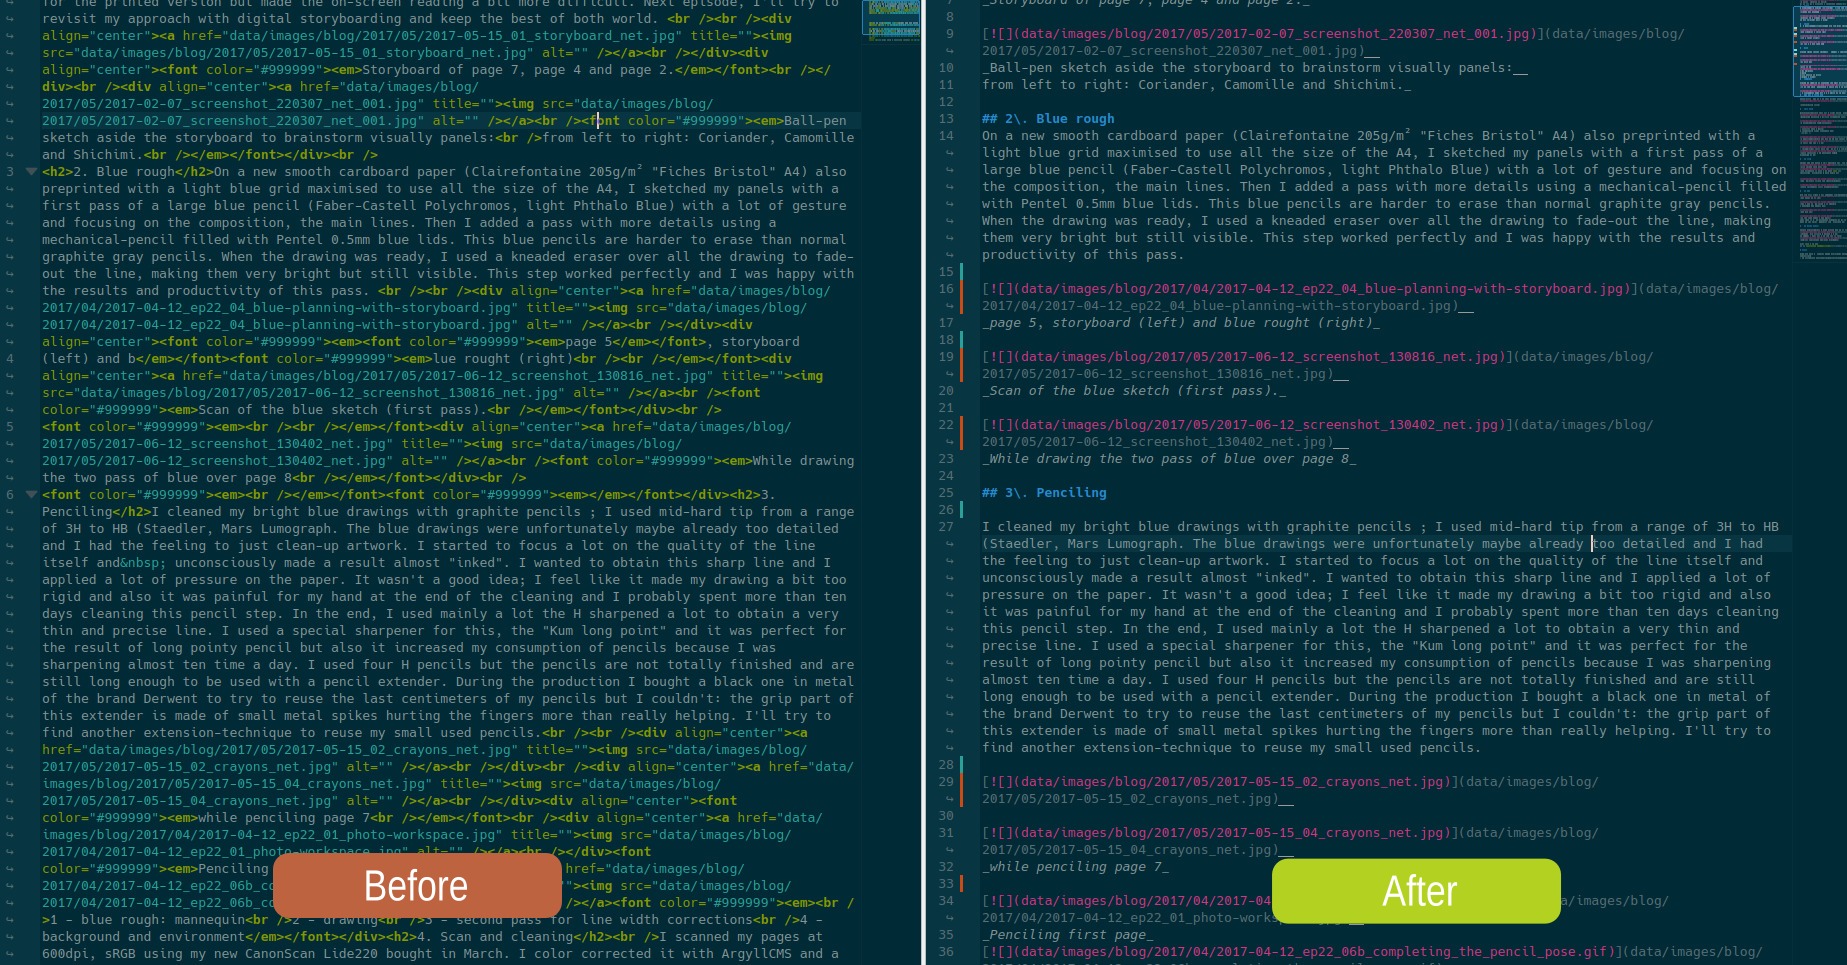
PlxEditor HTML on left VS Markdown on right: this is the same article
Why?
I moved everything to Markdown because all my notes, my Pepper&Carrot scenario, my quick draft, my future tutorials and all my daily interaction on FLOSS project (Phabricator/Gitlab/Github) are revolving around Markdown. I also love the simplicity of this markup language.
For long time, I used a plugin in PluXML named PlxEditor but this one left a lot of extras markup on the way. I had many double empty <em></em>, long chain of <strong></strong>, empty <div>... and so many hazardous other situation happening after copy/pasting. Restructuring a text and moving a picture or moving a title was very tricky. The minified version of this tag soup stored inside an XML file made it even more complex and hard to digest because everything was on a single line. Impossible to read a diff of the file in this conditions. In contrast; while storing the source as markdown, I can perfectly read the diff and track the modifications.
Also, I'm spending a lot of time to edit and maintain my articles (even long time after their publication). That happens mainly thanks to your contributions, readers of my blog, who report me typos, broken links, corrections and improvements. I even have a weekly TO-DO task related to that. If you are interested to help me to correct, proofread, improve my future articles, or just grab a copy of the source; all you have to do now is to hit the gray button Download article source on the footer of each article. With the markdown file in hand, you can correct, edit then send it back to me (by email attachment or pasted online on a temporary pastebin-like service). I'll be now able to see clearly the modification with a tool like Meld that can compare two text files.
How I made this mod for PluXML
I'm writing this technical part here for the PluXML user out there who wonder how I modified PluXML to make this mod. A big part of the convert was done thanks to the Python script found here on the blog of Killian Kemps. Thank you Killian for your blog post, I'm keeping it in my bookmark since probably 2 years... It ran fine on Python3 and I only had to modify a paragraph in parser.py (diff under) to spice the markdown output to the flavor and format I prefer and prevent the output to break links and cut everything to 80 columns:
diff --git a/parser.py b/parser.py
index bfcee1a..17f1f66 100644
--- a/parser.py
+++ b/parser.py
@@ -41,7 +41,13 @@ def parser(post):
                         local_images_src = [image.get('src') for image in local_images]

                         # Convert the HTML content to Markdown
-            content = html2text.html2text(content)
+            h = html2text.HTML2Text()
+            h.body_width = 0
+            h.protect_links = True
+            h.single_line_break  = True
+            h.inline_links  = True
+            h.wrap_links = False
+            content = h.handle(content)
                 else:
:
Update: As mentioned in the first comment of this article by Karl Ove Hufthammer, a cleaning upfront before the conversion of the HTML code with Html Tidy could have been a good idea. It's only a sudo apt install tidy away on a Debian based O.S. and works as easily as tidy input.html > output.html ; something really easy and fast to apply to a large folder with a simple Bash loop. I tested it, it fixes a lot of the mistake of PlxEditor and it's a good tip.
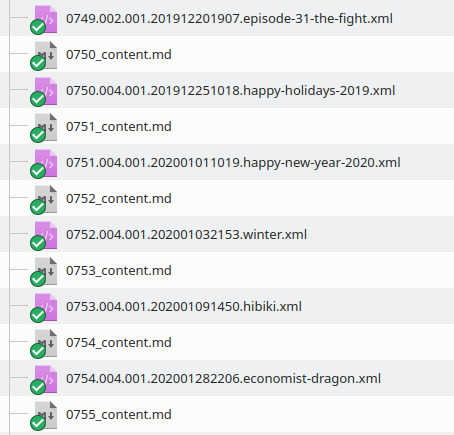
Then I erased all the content of <content> tag in the database of article stored on xml ( <content><!\[CDATA\[(?s-i).*\]\]></content> to select the text with a text-editor software like Geany or Kate who can search and replace accross a lot of document with regular expressions). Then I renamed all the markdown files obtained by the Python script (with an app, Gprename) and placed them side by side in the same directory, like that:

markdown files and xml files side by side
I then modified PluXML to read the content from the markdown file. In core/lib/plx.motor.php, I added this lines around line 692:
 $mdfile = PLX_ROOT.$this->aConf['racine_articles'].''.$art['numero'].'_content.md';
 $art['content'] = file_get_contents(''.$mdfile.'');
Then I modified the full artContent method in core/lib/plx.show.php at line 814 to convert my markdown into html and then display the article thanks to the library https://parsedown.org/; I downloaded it and placed the parsedown.php file into the same directory:
public function artContent($chapo=true) {
include(dirname(__FILE__).'/parsedown.php');
$contents = $this->plxMotor->plxRecord_arts->f('content')."\n";
$Parsedown = new Parsedown();
echo $Parsedown->text($contents));
}
At this step, PluXML reads your markdown files as if they were your content and it works everywhere in your templates/theme.
Modifying the mechanism to save the article was a little bit trickier , I had to modify core/lib/class.plx.admin.php at line 976 to add under the definition of the default filename:
$mdfilename = PLX_ROOT.$this->aConf['racine_articles'].$id.'_content.md';Then a little bit later at line 985:
return plxUtils::write($md, $mdfilename);The markdown can also be deleted if you want to use the delete button on the admin panel, in the same class.plx.admin.php locate where PluXML unlink(delete) the article around line 1013 and add that under:
$mdcontentfile = ''.$id.'_content.md';
unlink(PLX_ROOT.$this->aConf['racine_articles'].$mdcontentfile);
The file core/lib/class.plx.feed don't normally need tweak, very similar to plxshow , localize where PluXML display $content around line 250 then replace it with something like that:
    $mdcontents = $this->plxMotor->plxRecord_arts->f('content')."\n";
    $Parsedown = new Parsedown();
    contents = $Parsedown->text($mdcontents));
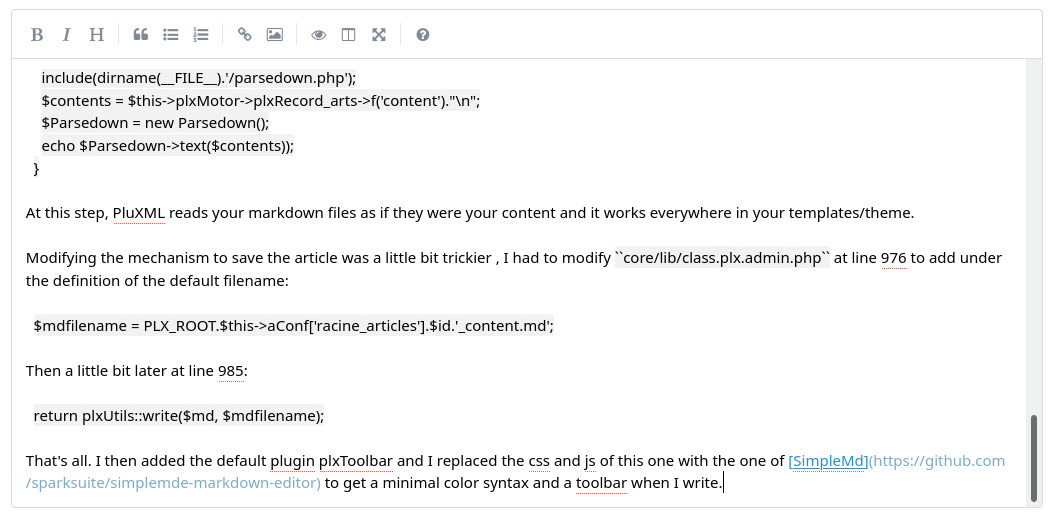
That's all. I then added the default plugin plxToolbar and I replaced the css and js of this one with the one of SimpleMd to get a minimal color syntax and a toolbar when I write. You can even customize the css file to get the syntax colored as you prefer.

SimpleMd in action while writing this blog-post
A long process
Unfortunately, all wasn't smooth: automation to convert the HTML markup resulted often into many files half broken, links splits over two lines, line break, etc... I tried to solve that with mass search and replace of regex patterns but I couldn't obtain a perfect result. Mainly because the input HTML wasn't really clean in the first place...
So, I still had to review one by one all the article and fix them all manually... Probably that was the part of the process that took the most of time but with over 500 article and an average of a quick 4 min fix per file, 30h are quickly spent... That's the charm of getting a blog since a long time and managing a digital past.
Fortunately, cleaning markdown with a colored syntax is a solid process: I could focus on the structure of the content and I was sure the rendering would be fine. I had no surprise and I really had a What You Mean is What you Get experience.
To be released soon
So what will be the benefit of this time investment? This change will allow me to release two bigger than usual articles I have as draft:
Production Report: Book project, Part.3:
This article is around the corner and will be the result of all my experimentation and conclusion about the Mini-Books project. I'm still waiting the last Mini-Book 5 print proof in my mailbox.
A guide to install my GNU/Linux system
I'm really happy with all the install guide I wrote over the last ten years; but I had hard time to digest the regressions of the GNU/Linux dekstop for artist over the last five years and I did stop to write them... But I decided to do it again because it was useful. The guide will be based on Kubuntu 19.10 with an evolution to 20.04LTS in April.
That's all, I for sure have more ideas but that will be for later.

