Videocapture settings for the Blend&Paint DVD

Blend&Paint is my next DVD video tutorial as you probably already read here last week . The DVD is actually on a presale period on the Blendere-shop during the time I finish the video editing.
How I do to setup screen-capture with LinuxMint
Recording desktop on Linux is actually not easy. I already wait for the future comments pointing me the good 'GTKrecordmydesktop' and other similar front end using the recordmydesktop program. I already know them , but they are actually broken and do wrong work ( audio not sync, frame dropped, wrong *.ogv files at saving ). Too bad, I used it for my previous DVD and it worked like a charm. So, when something like this don't work, you have to find workaround. I finally choose ffmpeg to grab the X11 datas, as well as the audio, and developped with the help of various script found on forums my setup. Here is how I did in hoping it will helps.
Gnome configuration for ratio
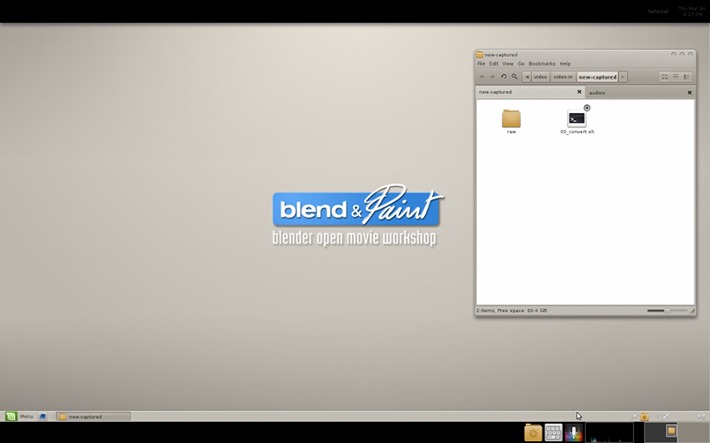
First I wanted to produce as output video a 1280x720px video at 30fps. My first problem was about my 1680x1050 monitor not at the same ratio than the video I wanted to record. To keep the windows not jumping outside of my permited area to record with the 16/9 ratio, I added 2 black gnome panel to my desktop ( top 55px , bottom 50px ; thanks to my old math for proportions ) . On this panel I could easily add other information/tool for me , as script launcher, or a virtual desktop changer applet to hide my terminal with the running ffmpeg script, or a monitor to see how processors behave during recording. Here is a screenshot of this setup : ( I created another 'user' on my computer to setup this )

The ffmpeg video capture script I use :
A simpler script developed by Nathan Vegdahl is available on this newer blog post
I created a *.sh script files executable with this setting inside. It was a big waste of time at starting to find the right setting, because even if there is a huge documentation, most of it is outdated ; and because of bug with the actual Linux Mint 64bit default ffmpeg repositery , I needed to compile the last ffmpeg from source. Hard time for a user as me.
#!/bin/bash
gnome-terminal --tab -t "AudioRecording" -e "ffmpeg -f alsa \
-ac 2 -i pulse -b 192k \
-threads 1 /path/to/your/audio/audios/$(date +%Y%m%d_%H%M%S).mp3" \
--tab -t "VideoCapture" -e "ffmpeg -f x11grab -r 60 -s 1680x944 -i :0.0+0,56 \
-sameq -vcodec libx264 -vpre lossless_slower \
-threads 4 /path/to/your/videos/new-captured/$(date +%Y%m%d_%H%M%S)_raw.mkv"
(replace /path/to/your/audio/audios/ and /path/to/your/audio/videos with your folder path )
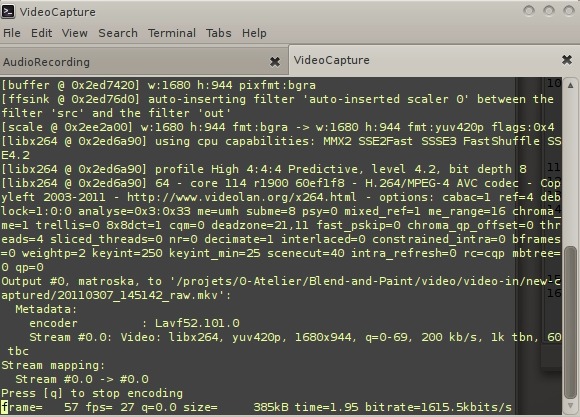
 This script open 2 tabed gnome terminal
This script record only a part of my 1680x1050 screen to crop the 2 black gnome panel and fall to the 16/9 ratio. ( 1680x944 *.mkv video output ). I compress the video on the fly and keep good performance. Thanks to my multi processors ; corei7. I exit the recording by pressing 'Q' over the terminal. (Note : I record my voice as notation for video editing, on the DVD I don't speak but use text label. )
1st video convert for Kdenlive :
When video are recorded, I batch convert and compress them to 1280x720 using this script I made launched in the same folder than the videos :
#!/bin/bash
cd /projets/0-Atelier/Blend-and-Paint/video/video-in/new-captured
mkdir raw
for mkvmovie in *.mkv ; do
frameoutput=${mkvmovie/.mkv/-editable.mkv}
echo ==============================================
echo ==== Processing $mkvmovie ====
echo ==============================================
ffmpeg -i $mkvmovie -vcodec libx264 -r 30 -vpre lossless_slower -s hd720 -threads 0 $frameoutput
echo -------------------------------------------------------------------------------------------------------
echo the movie clip $mkvmovie was well exported to $frameoutput
echo -------------------------------------------------------------------------------------------------------
done
echo Job list finished
Kdenlive video edition:
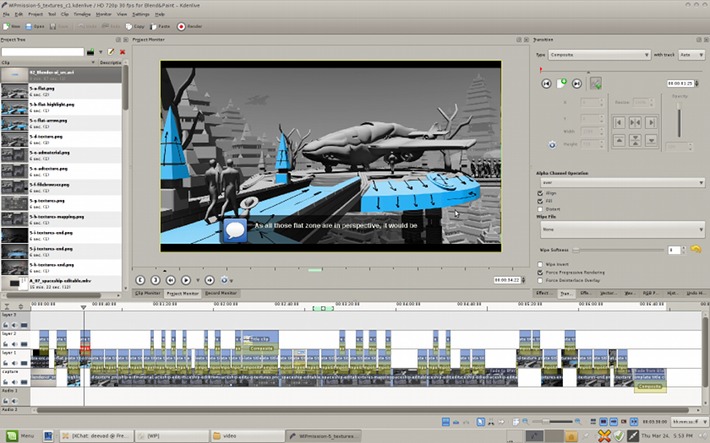
Now videos can be edited with Kdenlive , my video editor ( sunab repositery version ).

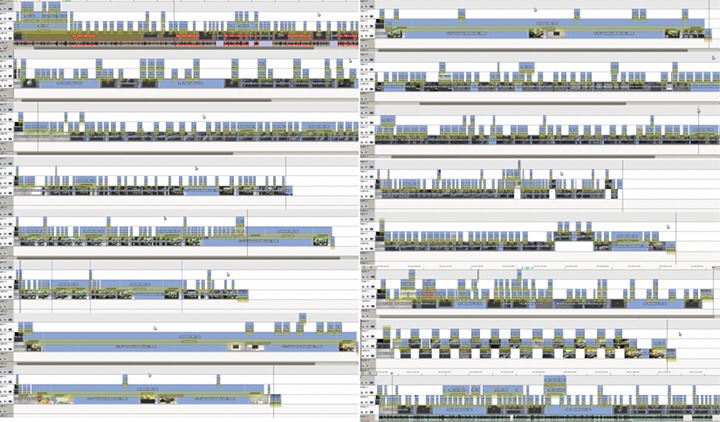
Doing text label and notation over videos takes a long time , but I really can't imagine speak in english on a DVD tutorial. For the moment I spend the 4 last weeks for video editing 3hours of full making of. Here under a screen of the video blocks : Many little label , graph , video cut , effect and transition. DVD is ready really soon, just need to add bonus and correct it here and there now.

Kdenlive video rendering :
When done, I render in Kdenlive with this custom profile :
f=mp4 acodec=libfaac ab=384k ar=48000 ac=2 pix_fmt=yuv420p vcodec=libx264 r=30 cqp=0 me_method=esa subq=8 qmin=10 qcomp=0.6 qdiff=4 qmax=51 coder=ac partitions=+parti4x4+parti8x8+partp4x4+partp8x8+partb8x8 refs=16 flags2=+dct8x8+mixed_refs trellis=1 threads=0 aspect=%dar
It's produce large files *.mp4 but lossless ; ready for the final conversion for including on the DVD ; I plan to use Xvid as ffmpeg2theora produce laggy OGV since last versions.
Conclusion :
Useless to notes ; what a headache to find a correct workflow to produce videos capture on Linux nowadays. You can now better understand why there is no more artist producing quality video tutorial on Linux ;)
I hope I will not have to reinvent a third method if I want to produce another DVD.
note: this method and the actual Mypaint version has a known bug not solvable for the moment that unfortunately appear on my DVD at few moment ; the colorpicker keeps displayed on screen instead of the brush cursor. Fortunately this not affect the readability, or the comprehension. Just a funny cursor sometimes

26 comments
Awesome! Those ffmpeg scripts are worth gold, it's always a pain in the ass to experiment until finding the right options... Thanks for sharing!
Hello David, thanks for sharing your knowledge! Unfortunately screencasting on Linux went down the drain lately, but your scripts might change the situation a little.
One tip for people with slower boxes (like me): Use the FFMPEG-switch "-vpre -vpre lossless_ultrafast" which greatly reduces the load...
@Gottfried Hofmann
I'm afraid it never got out of the drain in the first place :( The only more or less alive project is recordItNow and it's far from perfection as well.
@David
I think I'm going to steal you Kdenlive layout. The automatic tab switch after dragging a clip on timeline used to be driving me nuts :)
To update a bit ; Mypaint team solved the problem I mention here in "notes". It's already commited in Master by Andrew Chadwick. Many thanks again Adrew ;) bug repport here : https://gna.org/bugs/?17940
@Yorik : I hope they will work for you ; I forgot to mention in the article : Linux Mint 10 (aka Ubuntu 10.10 Maverick Meerkat) , 64bit.
@Gottfried Hofmann : Oh yeah, thanks to add it, I might update this article to mention it too. Cool video on Blender Nation about Suzanne and dissolve. Perfect for a cool title on my nexts project :)
@Alexandre : Oh cool if my layout inspire you :) Me too I got nut with the default Kdenlive layout.
Video editing is the weakest issue with Linux. I have been trying to migrate off of Windows to Linux full time, but there are still issues that need to be resolved before I can commit. For now, I will keep using a duel-boot system.
Hi David, thanx for sharing man. Have to disagree with you on that you're the only one making videotutorials on linux! ;)
Having said that I must also admit that at times it can be *very* hard to figure the proper settings out. I'm in the middle of making a series of videotutorials and I'm also using matroska as a container, capturing 25fps. Everything seemed to work fine until I imported the vids to VSE for editing. At that moment I realized that the video fps was actually at 50fps and not 25! There appears to be a mismatch between the frame rate of the matroska container and the x264 codec. While mediainfo, VLC, and even VSE play the videos back properly, rendering out leads to loss of audio and video sync. Btw, ffmpeg shows that the actual frame rate is 50 fps!!!
I'm working on a solution atm, and I noticed that you also capture at a very high frame rate (@60fps) and then re-encode (@25fps). I tried that but it didn't work. I'll probably post this on Blenderartists as it might save other users' time.
@Steven Powers : I totally understand.
@blendercomp : Oh, good to know I'm not alone in this jungle :) About my frame rate at recording ; true I set it to 60fps ; but the truth is ffmpeg take 'what he can' sometime lower than 22fps and sometimes greater than 35fps on my system.
The re-encode process is here to make all 30fps to work faster in video editing software. Hope you'll have your solution soon :)
Hi David
Do you have the answer about what happened to the others DVD's of Blender Fundation?
http://www.davidrevoy.com/index.php?article59/blender-dvd-open-movie-workshop-7-blend-paint
As always excelents tips ;)
Greetings
@erik90mx : Thanks for your patience , I finally get the answer : yep the DVD mancandy and Character Animation are out of sell. They will not be republished ( not in 2.4x version ; but maybe updated to 2.5x version if authors take time around ) :)
Thanks for your comments !
Thank's david, but i have a question, what can i do if my desktop laptop resolution it has 1280 X 800, so what can i setting in my laptop, to produce a high video quality in 1280 x 720, thank's before... kdeinlive i use for editing result video from recordscreen that you post on your new blog content...but i have problem because -- i so confused what can i setting on kdeinlive for the best high quality video for tutorial... :)
@Sinatria :
For this case, I would place a gnome-panel on the top of 80 pixels width to restrict the size of application ( and so have a 1280x720 area where application wrap to the space left ), and in ffmpeg recording I would customise the 2 following flag like this :
-s 1280x720 -i :0.0+0,80
mean ; record only 1280x720 of my screen, and start at 80pixel from the top. Normally it should work :)
thank's very much david. and i was try -- that a little different for your assume, i uses this command in console. -s 1280x720 -d :0.0+0,55
i change that -i value with -d value -- cause that was error if i use i,
and value 80, i change with 55 cause my header resolution is not 80, it is to high... so i descending that value... and that all work right.. david thank's again...
@Sinatria : Super if it's work like this ,and thanks for posting your setting, it will surely help other users.
Hi,
how do you create that typewriter effect with the text?
@Marco : It's a built-in effect of Kdenlive :
Add a title clip > type a text box inside > select it > Effect 'Typewriter'
There is also a delay and a start option.
Here I created a template title with the good settings, then I only called the template with modified text input.
You will get more info on Kdenlive wiki page about how to do a template title. Good luck !
On my computer the typewriter effect works, but only when I render the file. If I want to see a preview inside Clip and Project monitors I just see the first letter of the entire sentence.
Is it a known bug or I'm doing something wrong?
Btw Kdenlive is great software. I didn't know it was so advanced.
@Marco : Yep, Kdenlive is definitely a powerful tool. I think 'typewriter' is considered as an animation of the title , and that's why it can't play back in the main timeline. May be fill a feature request on the bugtracker of the team :)
Ok thanks for the answer.
I've noticed that sometimes the animation works in the Progect or Clip monitor, other times not. I guess it's a bug.
Sorry if I post another question, could you please tell me your shortcuts for Kdenlive? (you usually personalize them so I guess you have it done for kdenlive)
At the moment I just use the intuos4 wheel to move from a keyframe to another. I think I'm going to also use the joypad, but since everything I try is overwriting the default settings, it would be helpful to know in advance the shortucts of a person that already had a deep experience with the program
@Marco : :) For the keyboard shortcuts, I use the default one. I only added this for the titles : http://img137.imageshack.us/img137/9844/selection002u.jpg">(link picture Kdenlive shortcut), and also tweaked undo to direct Z and redo to Y ( à la Mypaint ); more and more I don't know why so much programs made us do stupid 2 keys when only one is sufisent.
I spent 3 hours yesterday trying to understand how to replicate the clip you have at the beginning with Blend&Paint logo.
I use a composite transition to resize and move it and a Vertigo effect (is it Vertigo the one you used it to get that animated blur with blend&paint logo?).
Unfortunately if I select composite and choose Over or And in the options I don't see the blend&paint logo over the back1 background, if I choose something else the minilogo.png looses its transparency and there is a black rectangular background behind it.
Any tips?
I use version 0.8.2.1. It's a tough world, after watching some tutorials I thought was clear in my mind how to use composite and effects. But when I tried to practice things were not so simple anymore.
Today I'll give a look to blender as video editor. Yesterday I also tried openshot, but for 3D effects needs to find blender and even if I give the right path it says it can't find it (I use Mint as distro).
@Marco : http://img443.imageshack.us/img443/429/selection001.jpg">http://img443.imageshack.us/img443/429/selection001.jpg : I used a combo of a Square blur and Brightness at start of the clip + a alpha at opening to get this effect :D
For Open-shot, sorry , I don't know how to use it, I never used it. For sure this issue is surely dicussed on their forum , if you have Linux Mint / Ubuntu based distribution it must affect other users.
Thanks! It was very helpful.
About Openshot, it works if you download blender 2.59 and you put in another directory at your choice (so you don't need to uninstall your blender version). Then you give the path in the openshot preferences.
It's useful because you can create 3d title effects in a simple way. But is not very stable as video editing tool. So it's better to import the clips in Kdenlive.
Hi David !
I wanna ask about how you encode your large files *.mp4 but lossless version into smaller one.
Thanks n Regards
@Aditia : Hi Aditia , I use here a batch script I wrote ( very simply ) to take all the *.avi files found in the directory ( generally the script is pasted in my export folder ) and with all the *.avi it convert them to compressed lightweight Xvid ( the file format I used on Blend&Paint, I used *.ogv on Chaos&Evolutions ).
You can download my script here :
http://www.davidrevoy.com/data/documents/xvid_final-compression-script.zip">http://www.davidrevoy.com/data/documents/xvid_final-compression-script.zip
To use , just open a terminal on the same folder than your *.avi , then drag and drop the script over the terminal window and press enter . ( note; you will need 'mencoder' package installed ). Hope you will like the file size and quality. Here I like it a lot.
Thanks David for sharing your script with us, this is awesome.
Post a reply
The comments on this article are archived and unfortunately not yet connected to a dedicated post on Mastodon. Feel free to continue the discussion on the social media of your choice. Link to this post:You can also quote my account so I'll get a notification.
(eg. @davidrevoy@framapiaf.org on my Mastodon profile.)