Autostiching scan with Hugin
About Hugin:
If you like drawing on large sheet of paper but decided you can't do it because you own only a small scanner, then this article about Hugin is for you.
What is Hugin? Hugin is a free/libre open-source software. With Hugin, you can assemble a mosaic of photographs into a complete immersive panorama, stitch any series of overlapping pictures and much more. I'm using Hugin since 2010. Hugin is a very technical tool with many options. The development team is doing big effort to simplify the process, and recent versions are really easier to use than the previous one, but still not really as intuitive as modern software: I still need my notes to get things done with it. But if you know your way and settings the tool is easy. Hugin can be really faster than doing the stitching manually and produce a perfect result. Convinced? Follow me.
Install Hugin:
On Ubuntu/Elementary/Linux Mint (Ctrl+C to copy line in your browser, Ctrl+Shift+V to paste on terminal. One line at a time).
sudo add-apt-repository ppa:hugin/hugin-builds
sudo apt-get update
sudo apt-get install hugin
On other Linux distro, Mac and Windows , check the download page of the project.
The process, step by step:
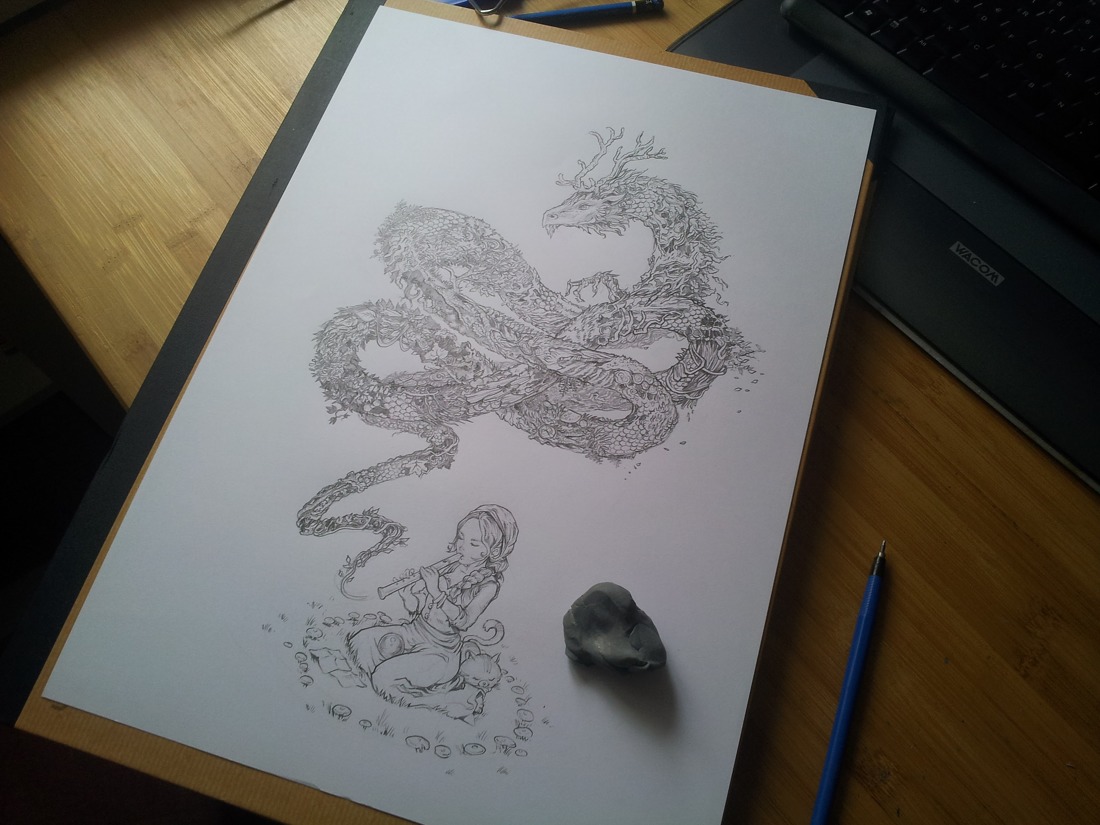
1. Here the problem start: I like drawing on A3 sized paper (29,7x42 centimeter / 11.69x16.53 inches), it's double size than A4 and have more room for drawings details.
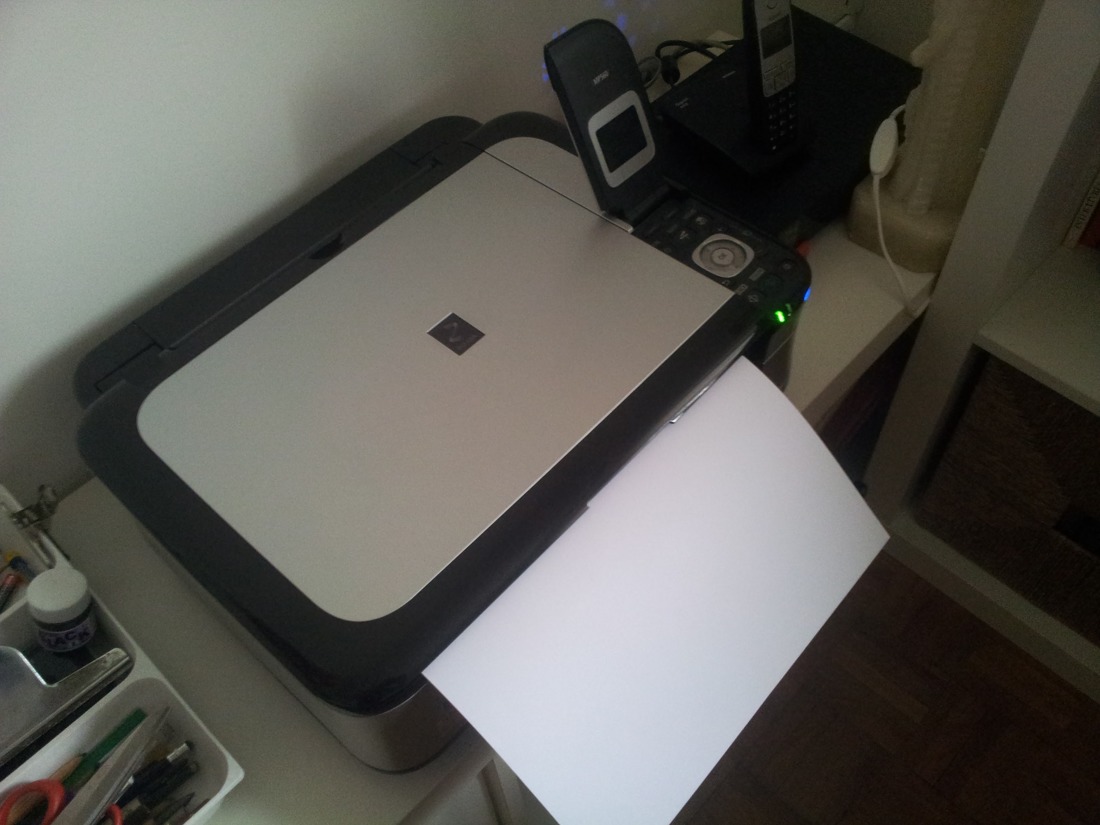
2. But I don't have a A3 scanner at home : they are expensive and take a lot of room. I also have no idea where I could find a A3 scanner compatible with Linux. It's only problems, so I have to find a solution with my A4 scanner. A4 scanner are cheap and nowaday bundled with many printers 'all in one' devices. Here under my old Canon Pixma MP560 all-in-one printer scanner with a A3 sheet in the A4 scan top part. I'm scanning my big A3 artwork documents this way in two time, flipping the artwork upside down on the little scanner.
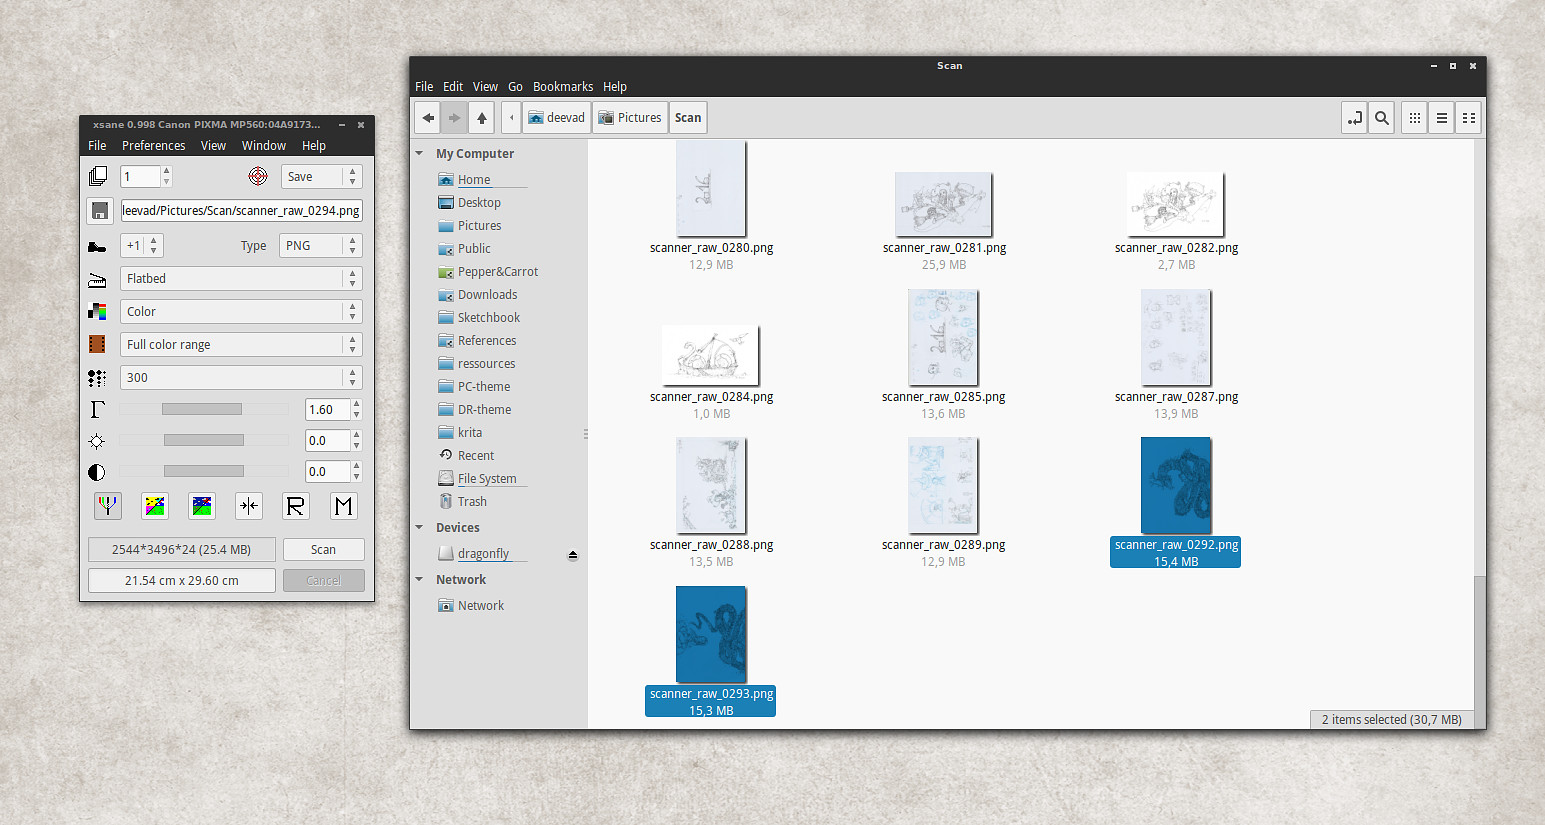
3. I scan them with Xsane on Linux Mint 17.3. I like Xsane because if you remove all unecessary panels and keep only the main user interface, it can just scan and auto-save the picture in a target folder. This way, I get two PNG files in sRGB , A4 sized with 300ppi quality (selected in blue here).
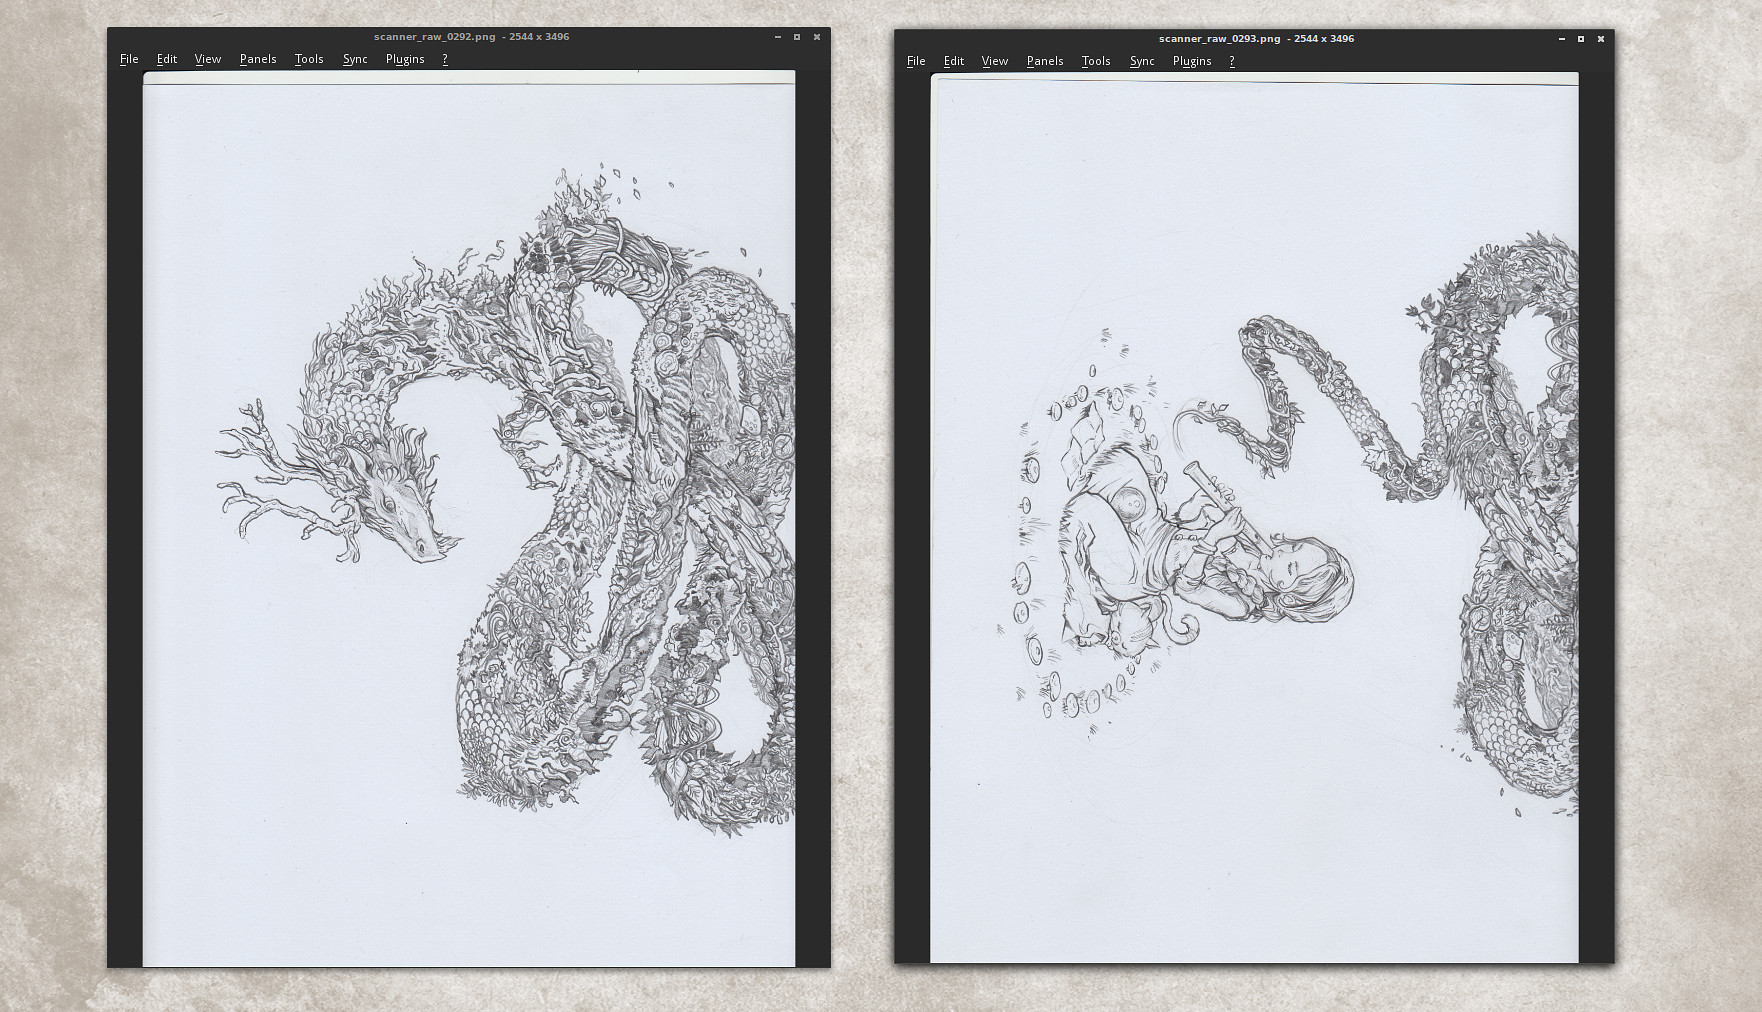
4. Here is the two scanned documents. I often have white margin all around the artwork, I rarely draw on all the surface of the A3. Only a central part of it. This way I need only two scans to get the full artwork scanned with an overlapping area. It's important to have overlaps. Hugin will use the informations in the overlapping area to match the document together and stich them perfectly.
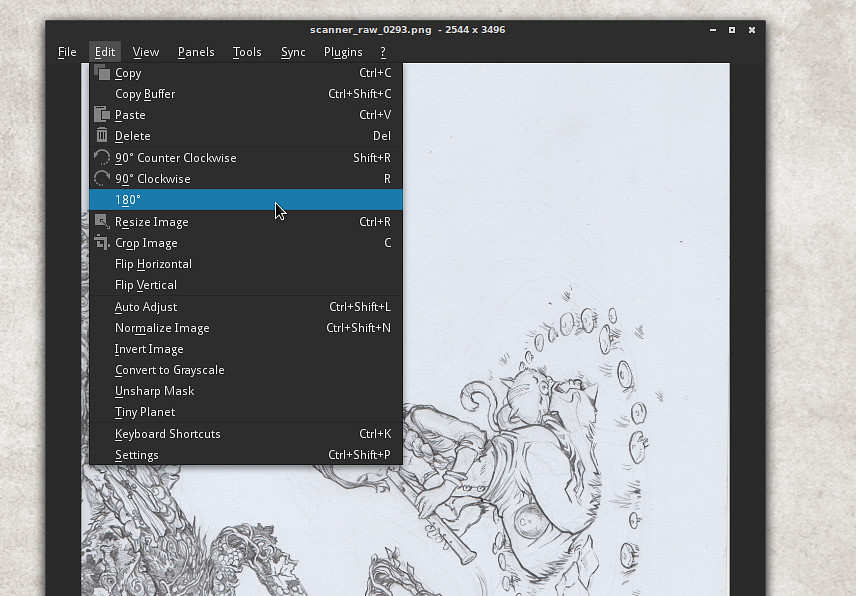
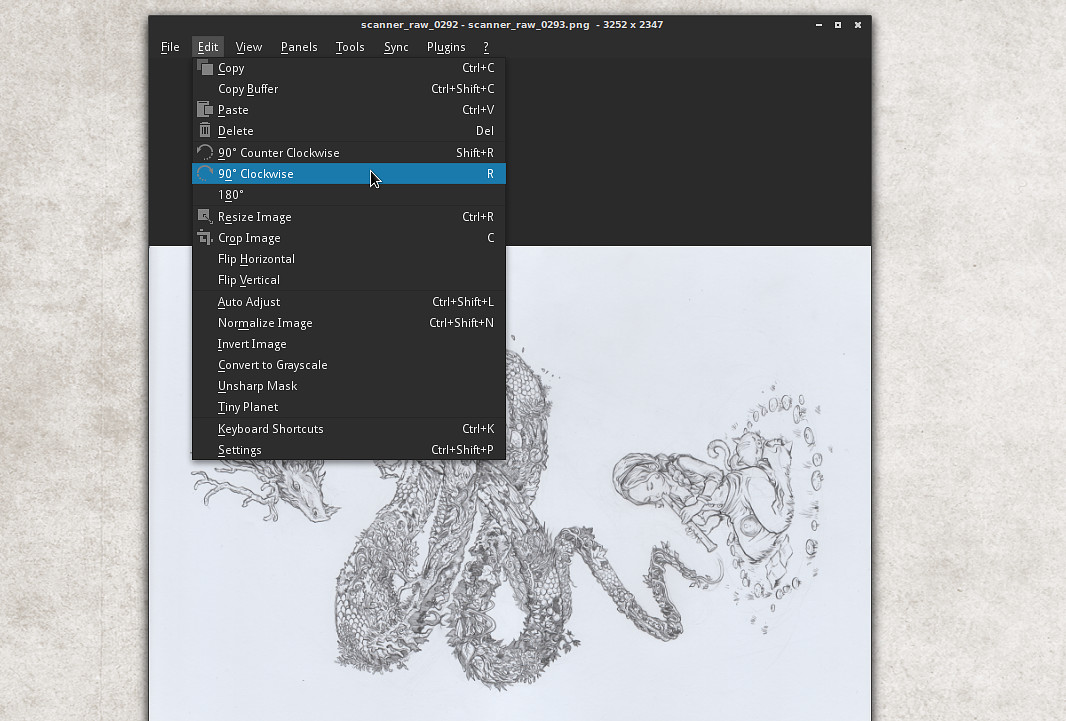
5. Before feeding Hugin with our raw scans, we need to prepare them a bit. That's why I'm rotating the second scan at 180° thanks to the editing functions of the image viewer Nomacs.
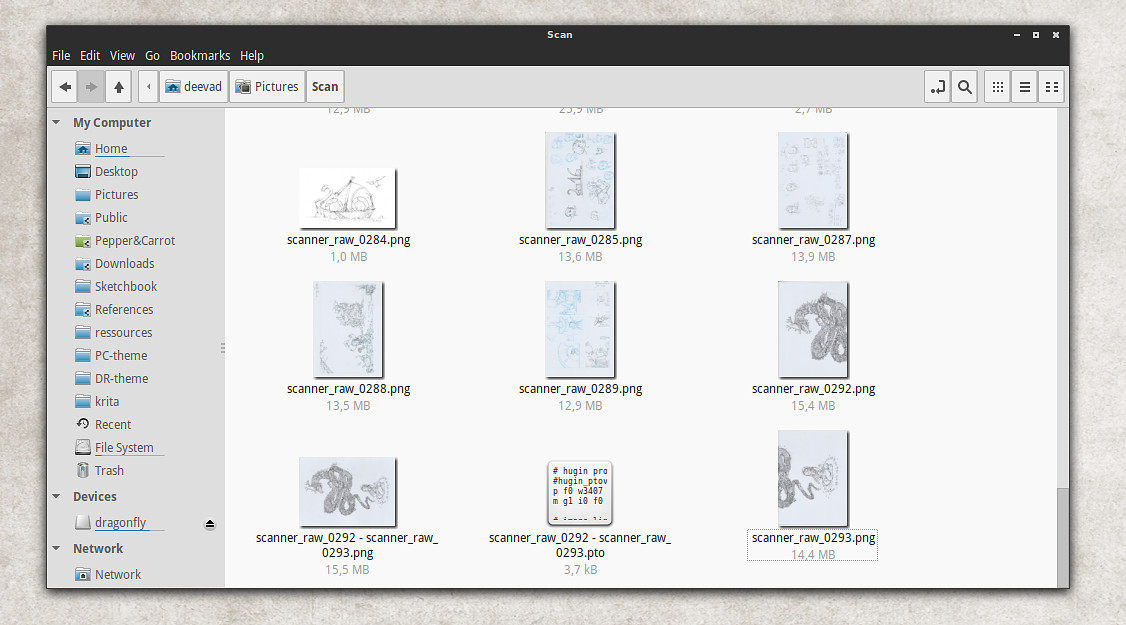
6. The preparation is all about filenaming and alignement. The filenames must follow and images must have similar orientation. Hugin does a good job only if the images are ready this way.
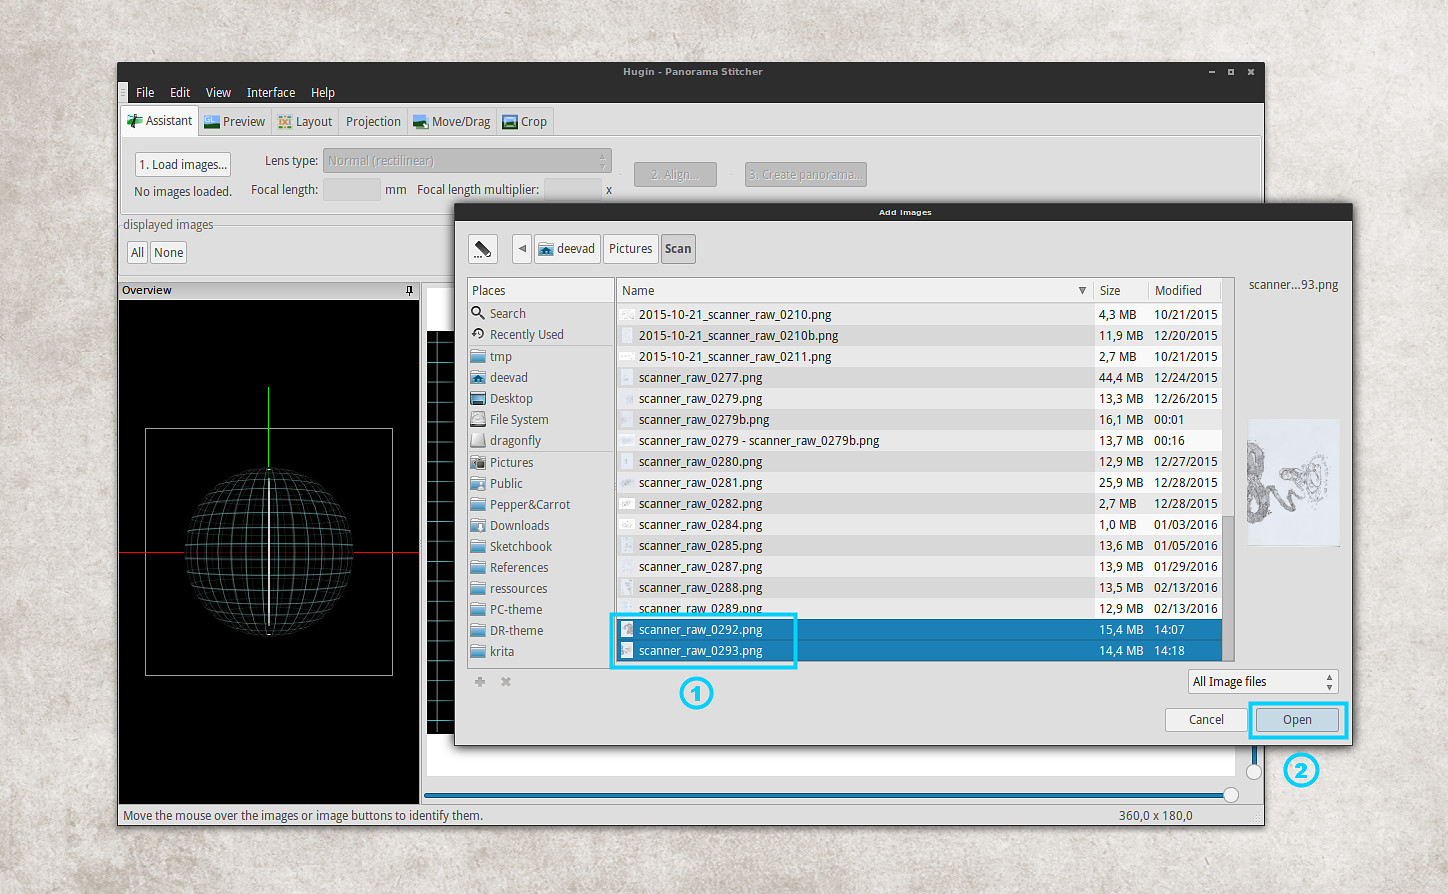
7. We can finally open Hugin. Maybe in your operating system's menu, there is multiple entries for Hugin. Select the one named "Hugin Panorama creator" in this case then press the 'Load images...' button.
8. [1] Do a multiple selection to select your files ( holding Ctrl key ) then [2] press 'Open'.
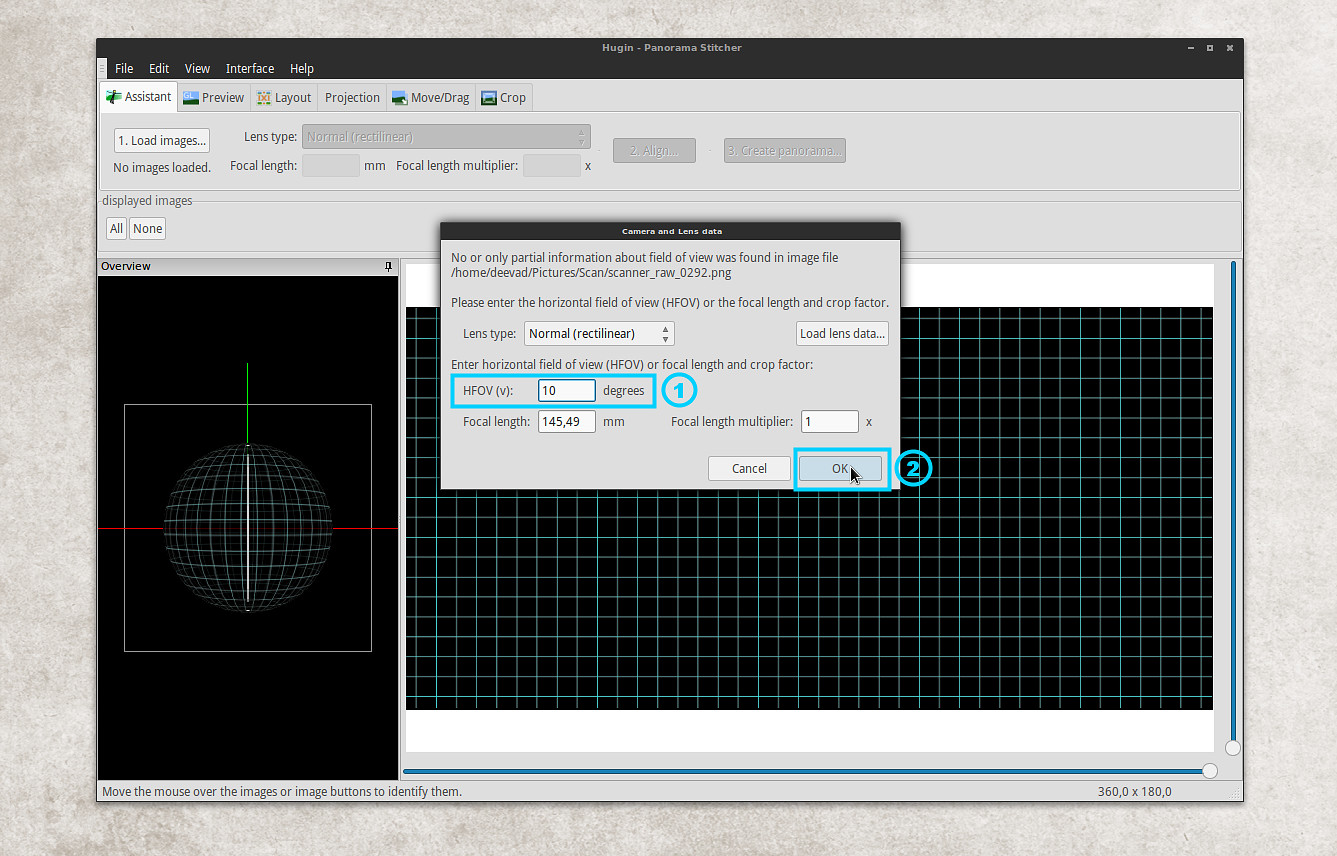
9. After the files are selected, you'll see this unfriendly dialog prompting you for a 'HFOV(v)' number [1]. Don't ask me what a 'HFOV(v) number' is, I have no idea. Just remember for this field to enter '10' degrees. This magic number come from an outdated official tutorial. You'll be stuck at this dialog if you don't remember it. Too bad a simple 'scanner' preset don't exist here to make this step intuitive... When it's done, Then press [2] 'OK'.
2021 edit: Franz, in the comment section of this article, reports that '5' degrees is even more precise; and it makes sens after also reading the explanation of Zachary Vance, also in the comment section. Thank you both for the feedback!
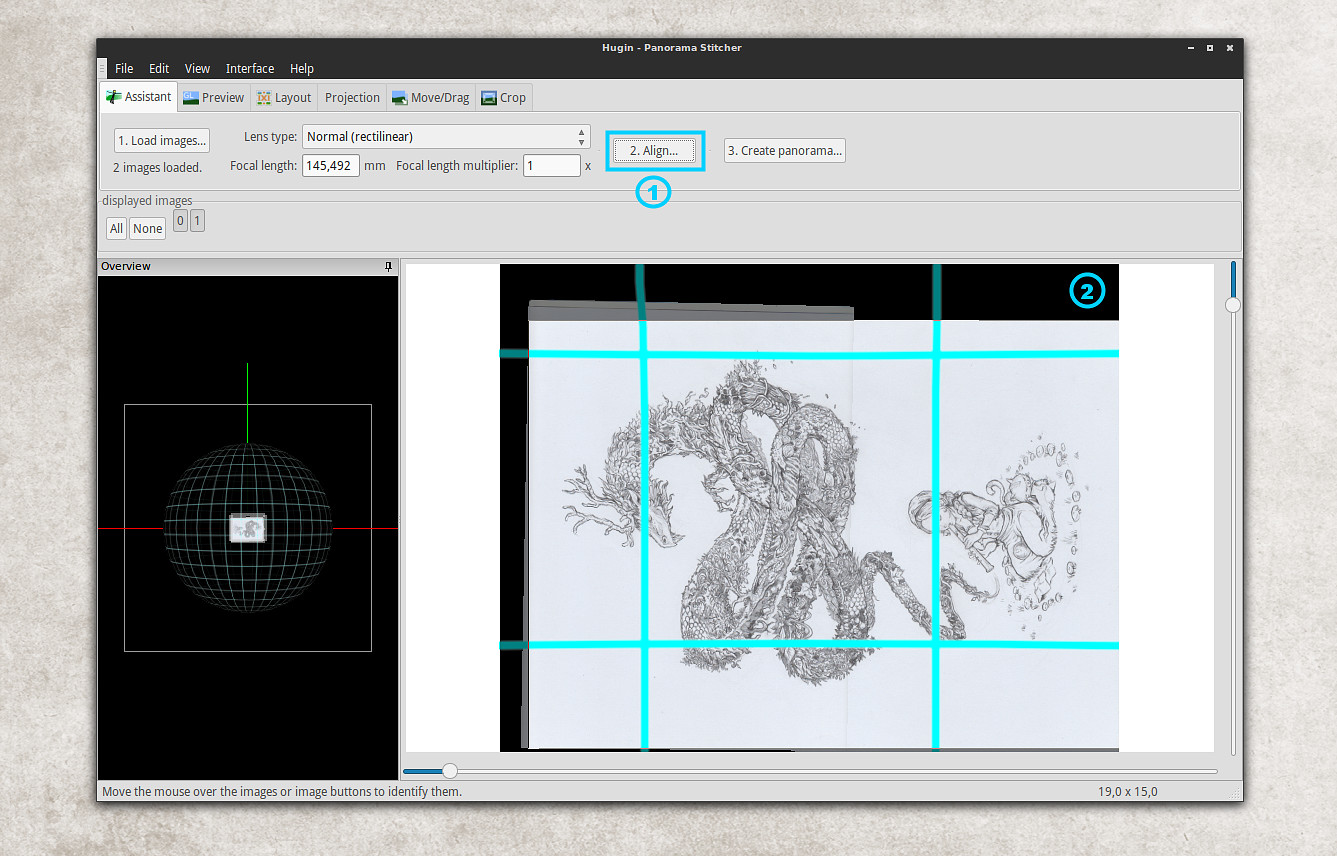
10. Press the [1] 'Align' button, it should pop-up a console with computer output you don't need to read (it will auto-close itself anyway). Just check your picture properly aligned after that within the control screen [2].
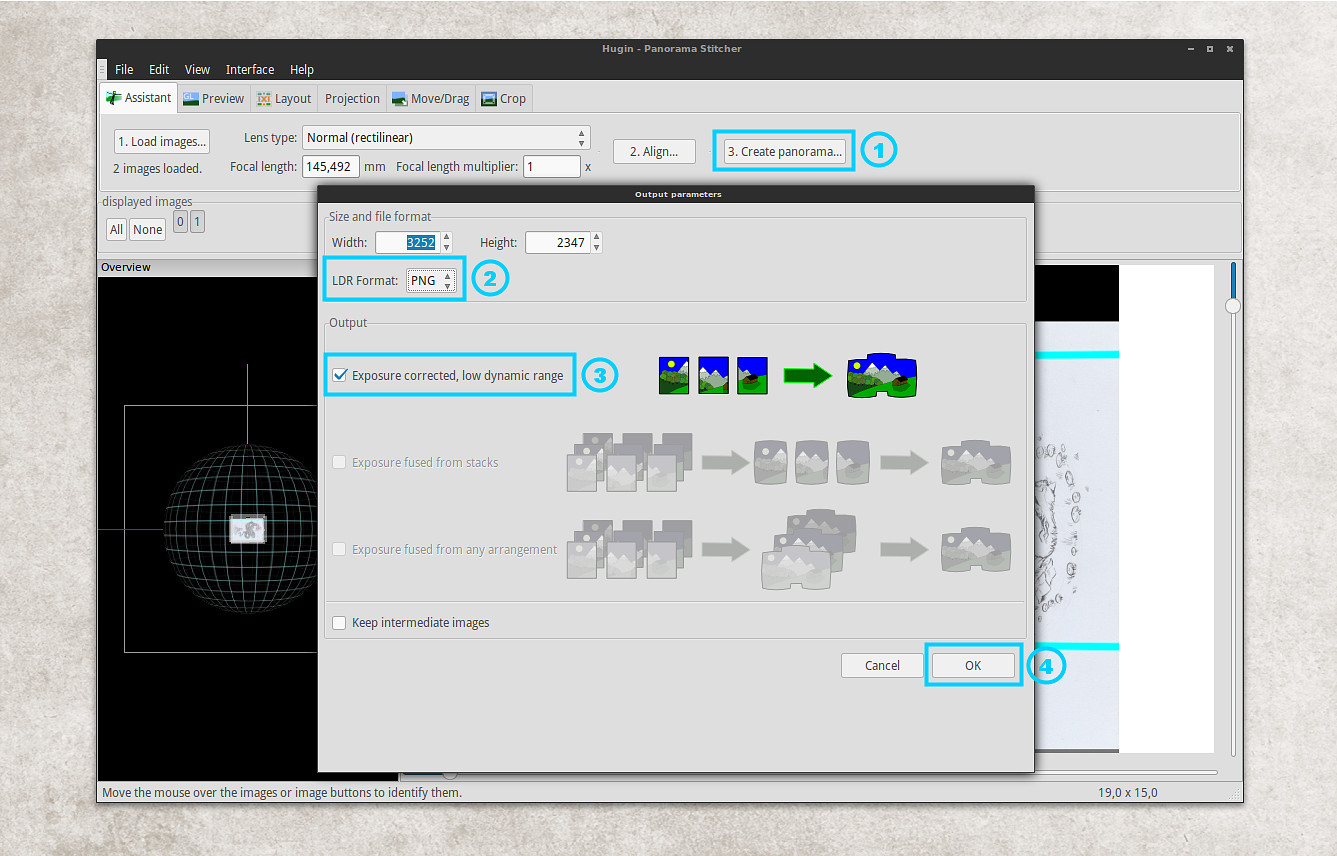
11. The last step, is to [1] Press the 'Create Panorama...' button, [2] switch the format to PNG , [3] Select the only option available and [4] press OK.
12. You'll be prompted for saving two files. Just keep the default name and press OK. Then another console will pop-up with computer output, just wait it to finish, it will close itself. You should have a new dialog on screen indicating 'Status Completed'.
13. Check your files on your file explorer: your autostiched version should be done. You can then close all windows of Hugin and delete the two original half-scan and the *.pto files created by Hugin.
14. A last step is just a little rotation with the image viewer Nomacs and saving.
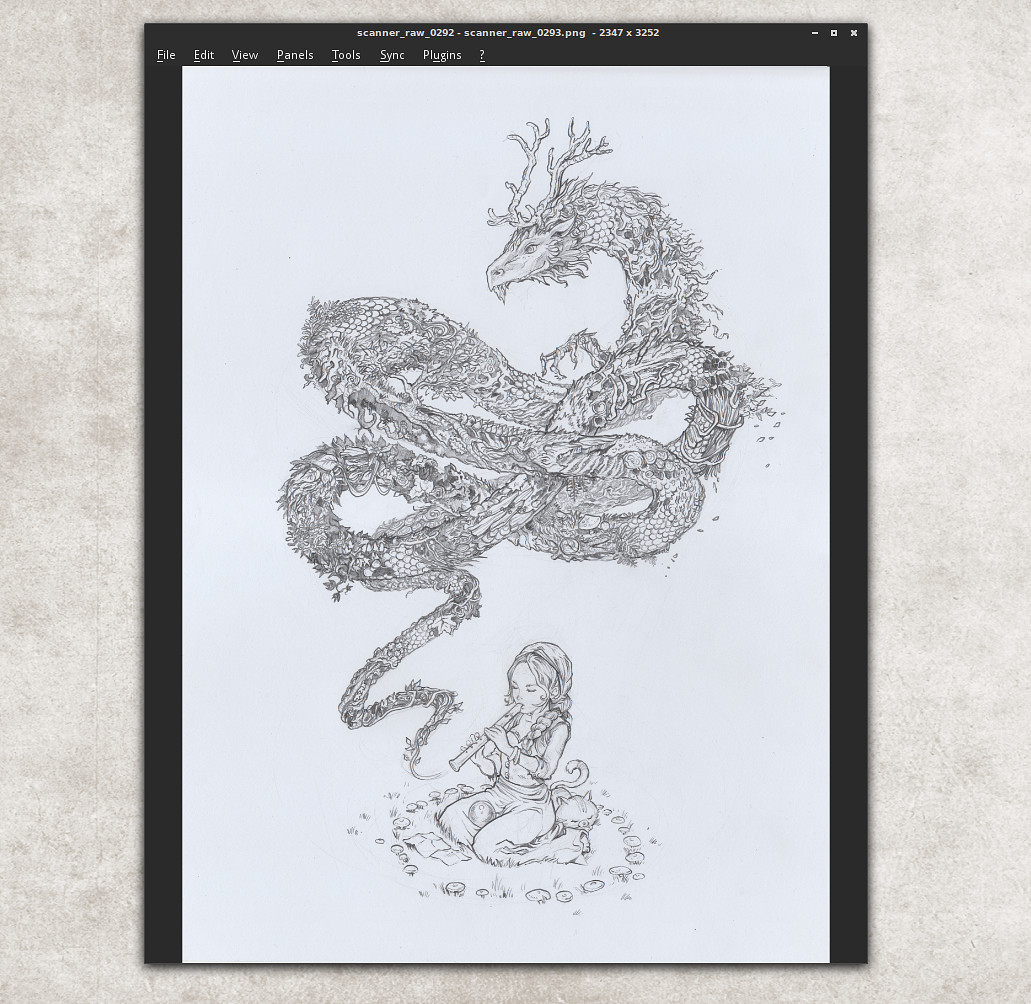
15. It's done : the two scanned parts of the picture were autostiched in a single picture thanks to Hugin. You can't notice the area where the two scanned were merged, even if you zoom on the paper texture itself. It's really perfect work.
★ You can find the hi-resolution result here .
★ The final colored artwork here (note: I removed the flute girl for artistic reasons.)
That's all for today and Hugin. If you practise, you can scan many large comic pages and stich them in no time with just clicking at the right button and fighting a bit with pop-ups and temporary files. I hope this tutorial will help you to draw on larger sheet of paper and take advantage of this great tool.
A big thanks to the Hugin developpers!


