


Getting started with Krita (1/3)
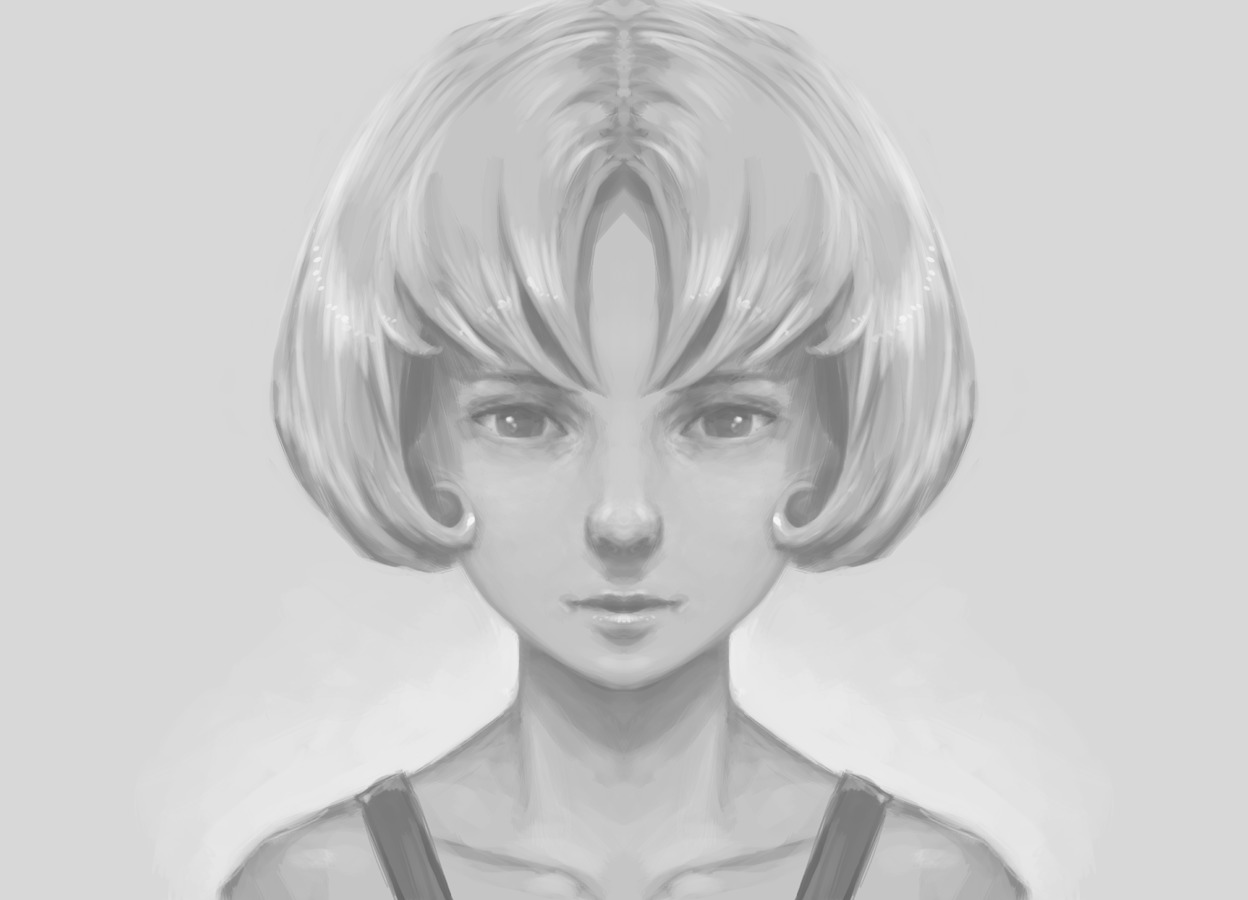
The result of this blog post tutorial exercise
"Getting started with Krita" is a tutorial series of three blog post. The tutorials were designed for Krita 2.7 in 2013 + my brushkit V3 . This brush were added in Krita's default brushes after Krita 2.8. Using a newer version of Krita ( eg. 2.9.7 ) you should have everything you need. I updated a bit the tutorial in september 2015. The screenshot are old and won't match your interface, but it's the best I can do at the moment to refresh this three post.
I hope you'll learn something with this series. My goal here is to share the passion I have for digital painting and help new talents to get faster rid of the technical aspect to do the essential : telling stories, sharing beautiful pictures, expressing an artistic soul, etc... My first tutorial will be a simple but rewarding one. 'Simple' because I'll write it as a step by step with all details to paint a symmetrical portrait, but without explaining the complex stuff underneath about theory ; and 'rewarding' because we will get a result quickly. It can be an ideal time investment if you have a first free afternoon to paint and want to learn basics of Krita while having fun.
Contents :
- Part 1. : black and white : setup and modeling ( you are here )
- Part 2. : colorize : layer stack of blending mode
- Part 3. : finalising : render, post effect
Let's paint !
Note :
- Save your document often during the process. I advice the 'Krita document' ( kra ) files.
- Click on the pictures of this blog post to enlarge them.
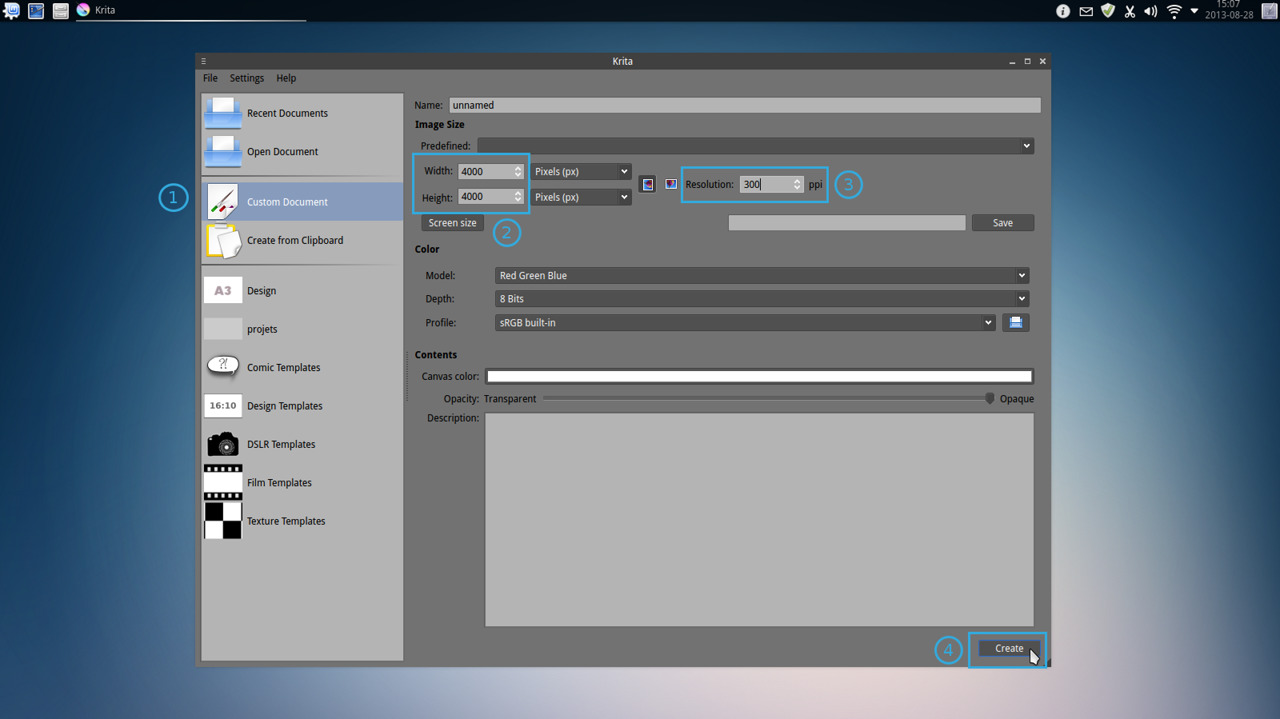
1. On Krita first startup go to File menu on top, then 'New'. A dialog will pop-up, select in it the tab on left "Custom Document"(1) and create a new canvas with Width and Height to 4000 (2) and set resolution to 300ppi (3) , as on the screenshot. Skip other field as Name or Image description , and press 'Create' (4).
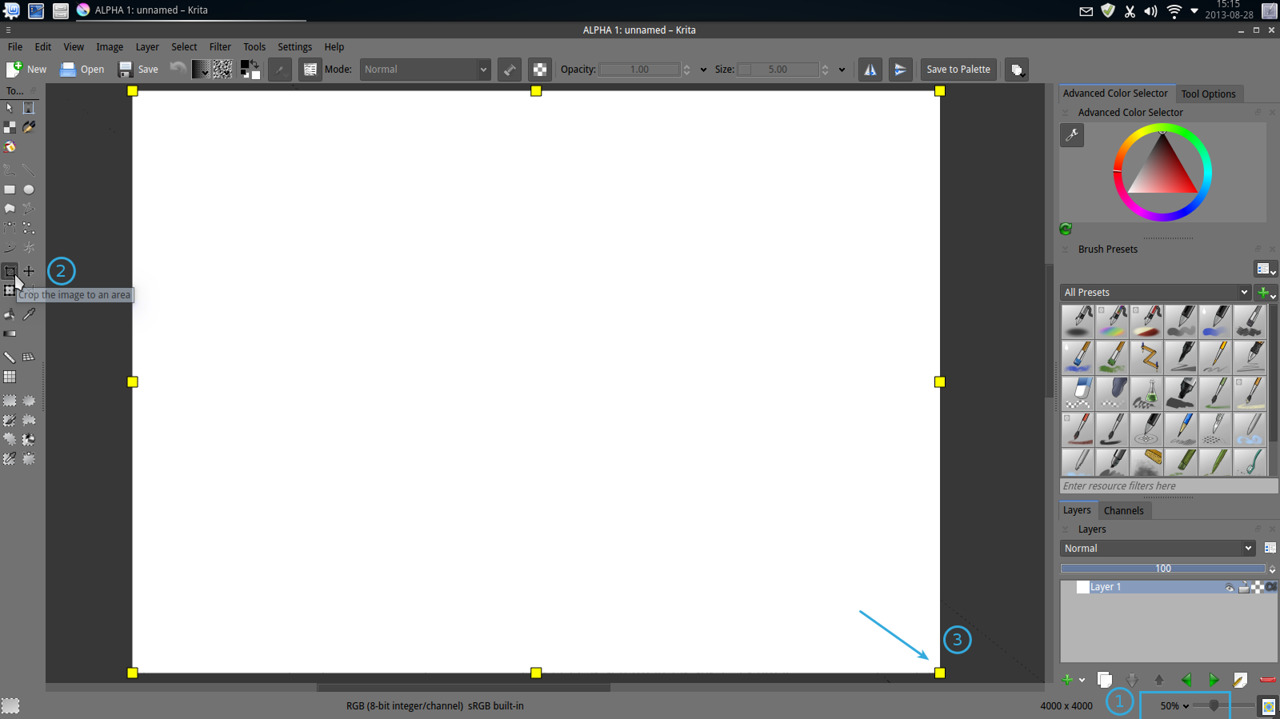
2. Maximize Krita Windows. Zoom your empty canvas to the 50% view (1) ( using '+' on keyboard or the mouse wheel ) . Take the crop tool (2) , and crop the visible canvas on your screen letting a border all around.
3. Click the little color square on the toolbar (1) ( the one under for the background color) step the value down to 216 (2) ( Hex: #D8D8D8 ) , then accept with the OK button (3) . Now press 'Backspace' over your canvas (4) , to fill this one with the grey background color.

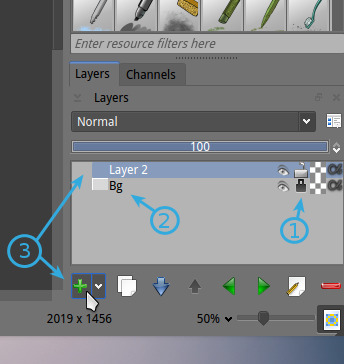
4. Lock your layer (1) and rename it ( double click on it ) to 'Bg' (2). Create a new empty "Paint layer" above (3) . Let the default name 'Layer 2'
5. Select the Freehand tool (1) and the default brush preset 'Bristtle_hairy' (2). On the 'advanced color selector' docker, select a dark mid-grey value (3) , and adjust the size with pressing shift+dragging the brush on the canvas to got a mid brush (4) ( check around 40px , on top 'size' slider )
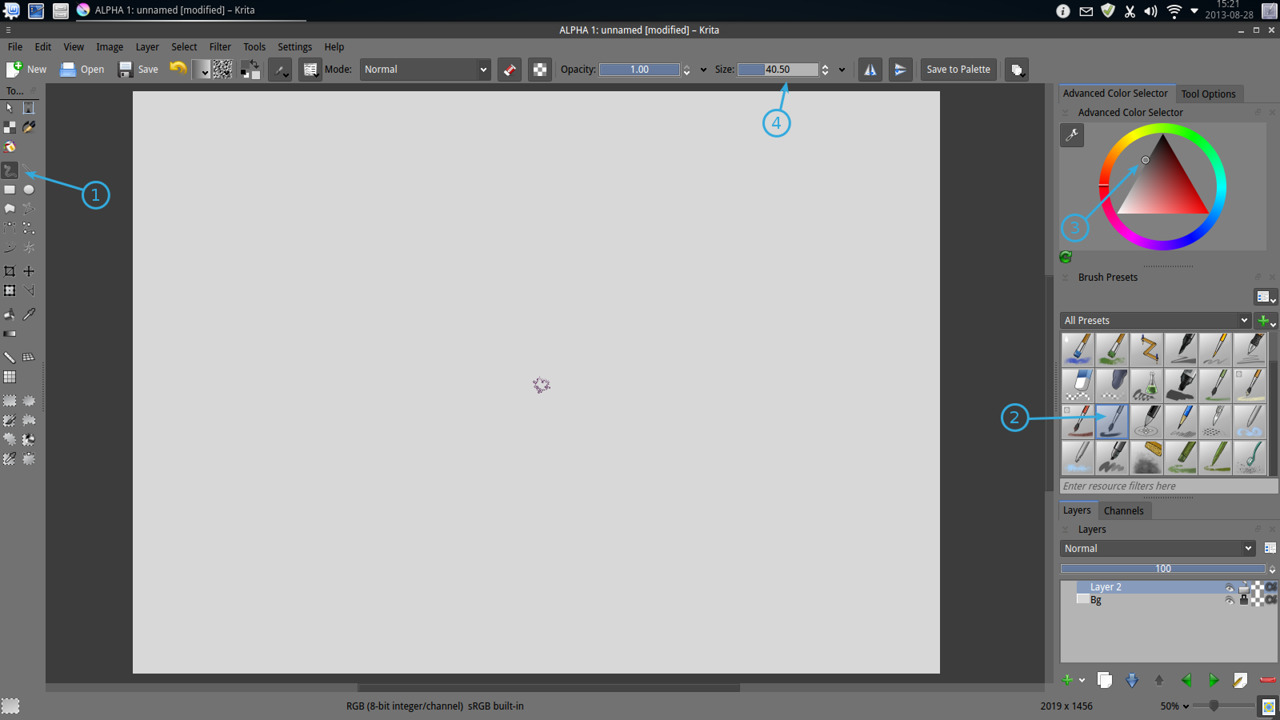
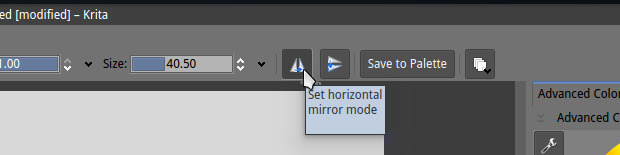
6. Activate the shortcut on the top tool bar to the horizontal mirror mode.
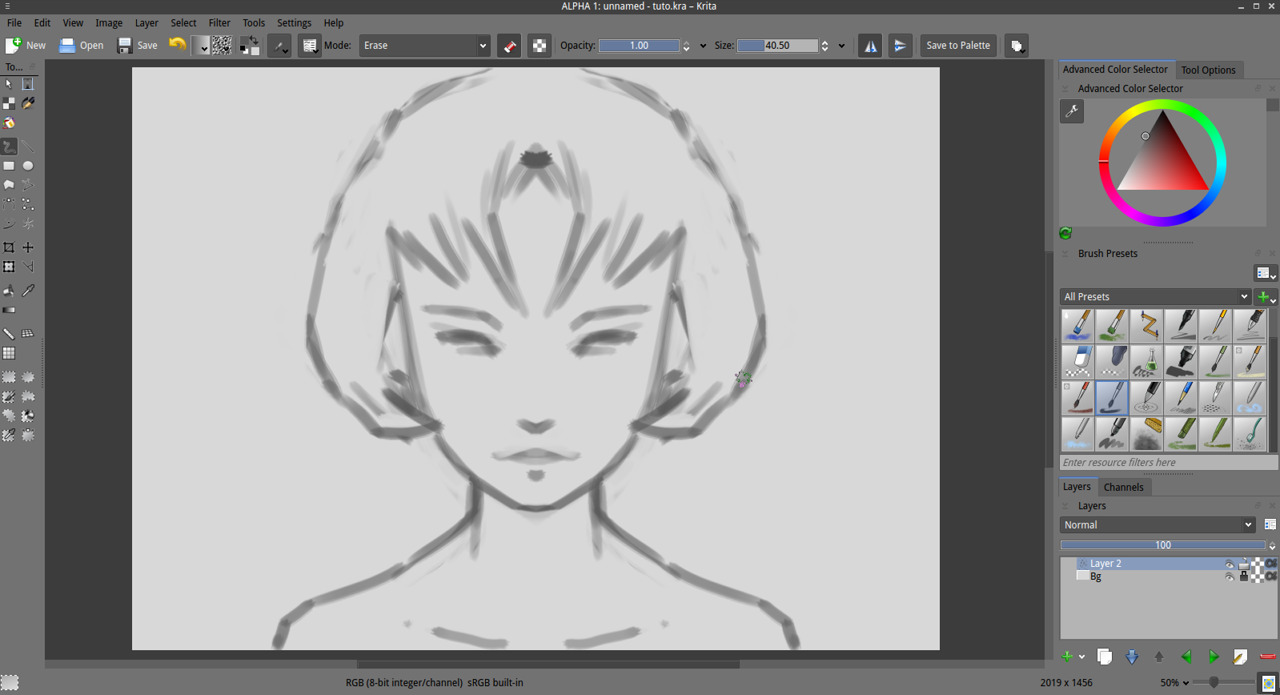
7. Start to draw on canvas large axes, with direct and simple line strokes. Shape the head, simple lines for the eyes , mouth, and nose, same for ears. 'E' key on the keyboard will switch your brush to erase instead of paint. Pressing it again will restore the behavior to paint. You can correct your stroke to get proportion you like. To delete all , in case you are not happy , press 'Delete' on the keyboard.
8. Block the shadows zone of your face , if you are not familiar with drawing or painting, this skill is relative to your capacity to abstract the 3D model of a face in your head , and know the volumes of it and guess the shadows cast by an abstract light source. If you begin, just try to paint the area under the eyebrows, and under the nose, volume for the hair, and for the neck. Again, use the eraser to enhance your modeling. Keep it simple : zone of light and zone of shadows.
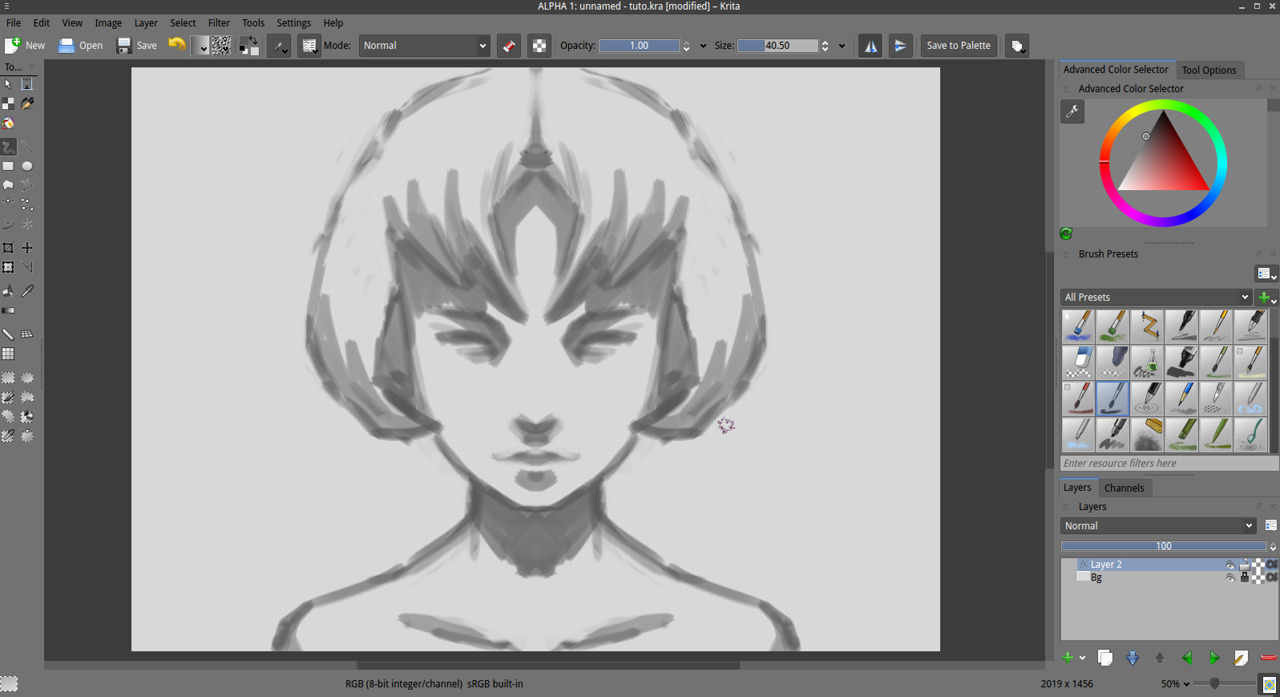
9. Create a new paint layer, and bring it between your blocked shadows, and the background. Select the default 'Fill_block' brush and fill the part inside the silhouette with a brighter grey ( brighter than your sketch , but darker than your background ).
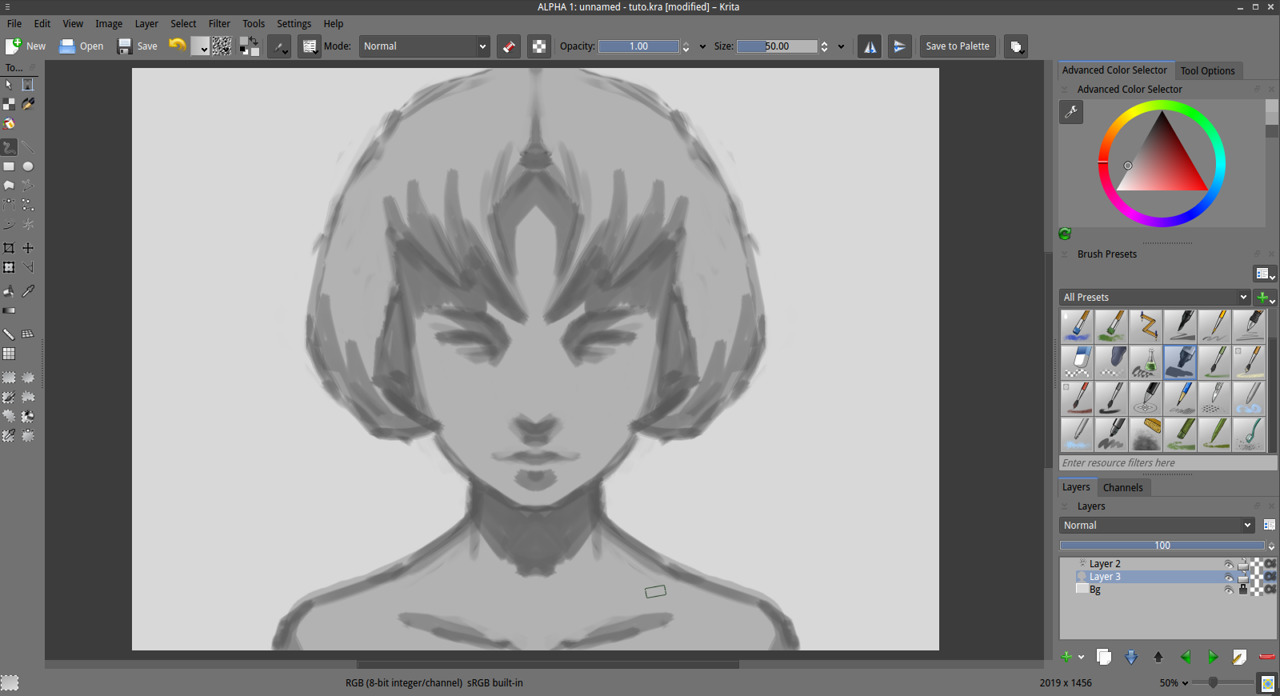
10. Select your layer with shadows, and 'merge it' with layer bellow with Ctrl+E , turn the opacity of the layer to 50%. Create a new 'paint layer'
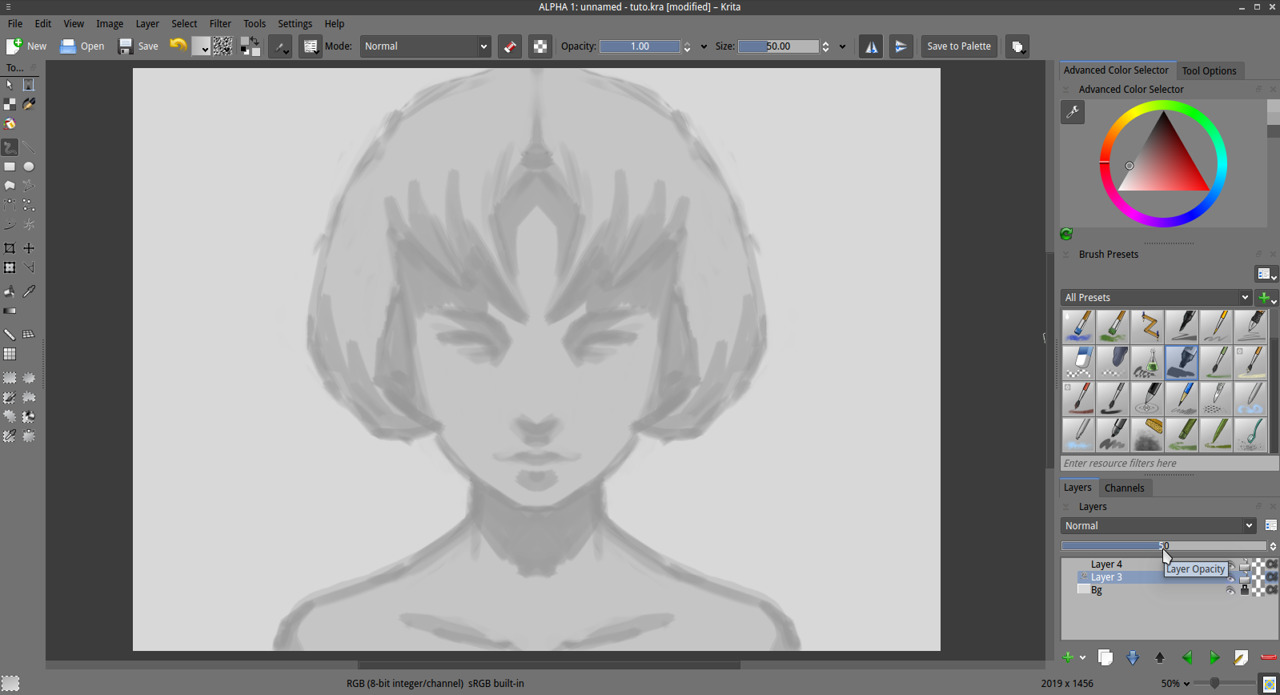
11. Select the Bristles_hairy brush again. Select a mid grey color in the Advanced color selector and start to draw more shadows by glazing successive strokes. Try to be subtle, play with the pressure of your stylus and erase when necessary.
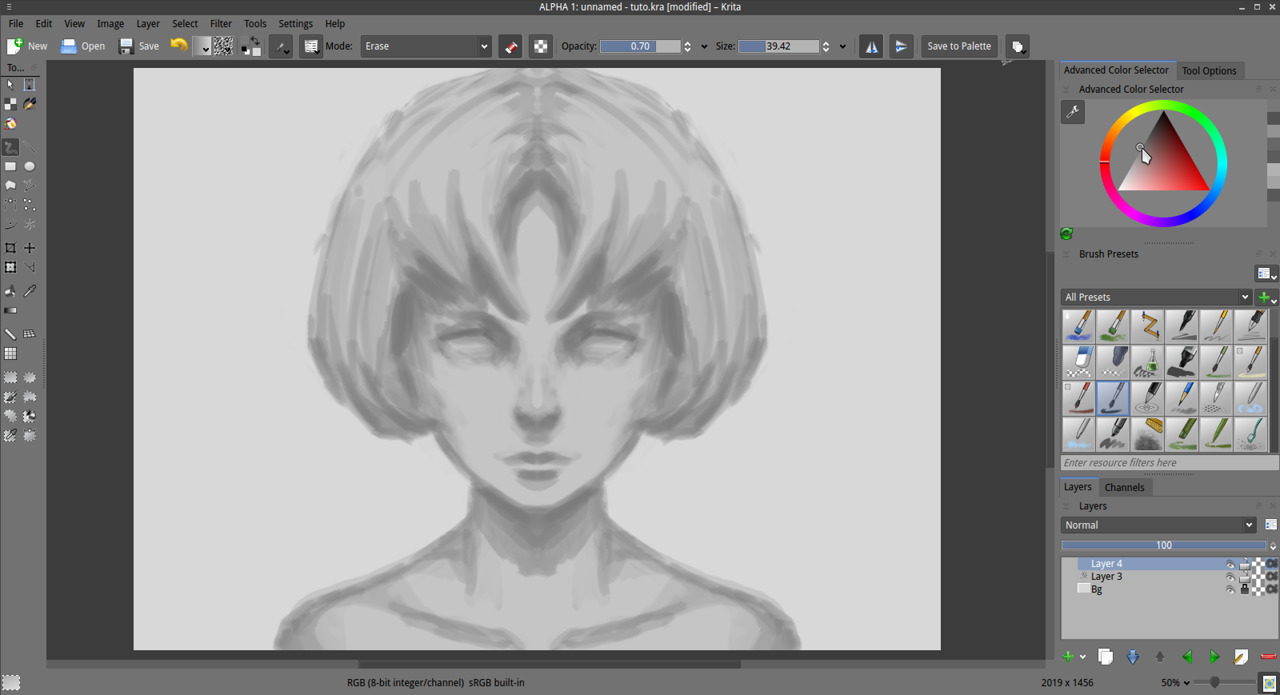
12. Create a new paint layer. Increase your grey color a bit , to reach the same grey value than your background ( or hold 'Control' to pick the color on the canvas ) and keep working on your modeling as you would do on a three dimensional plaster object.
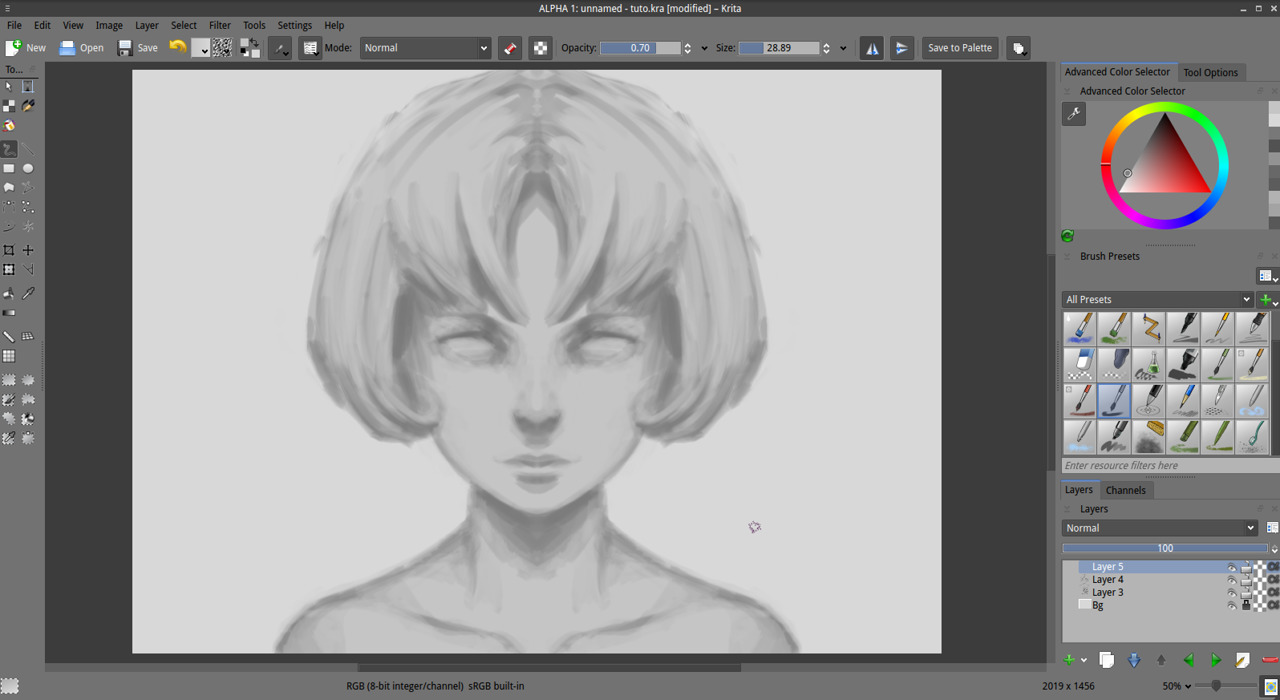
13. Merge layer with the layer bellow, use Layer > Merge with Bellow layer ( or Ctrl+E ). Create a new paint layer. Draw the facial features ( eyes / mouth / nose ) on the top of our volumes. Use only tones already present on the canvas with your brush opacity diminished to 0.70 , picking value holding Control + click on the canvas. Create hard edges where you can , clean silhouette contour, increase the spike aspect of some shapes. This part is ideal to fix things. Take your time and keep the bigger brush size you can, reduce only if it's necessary .
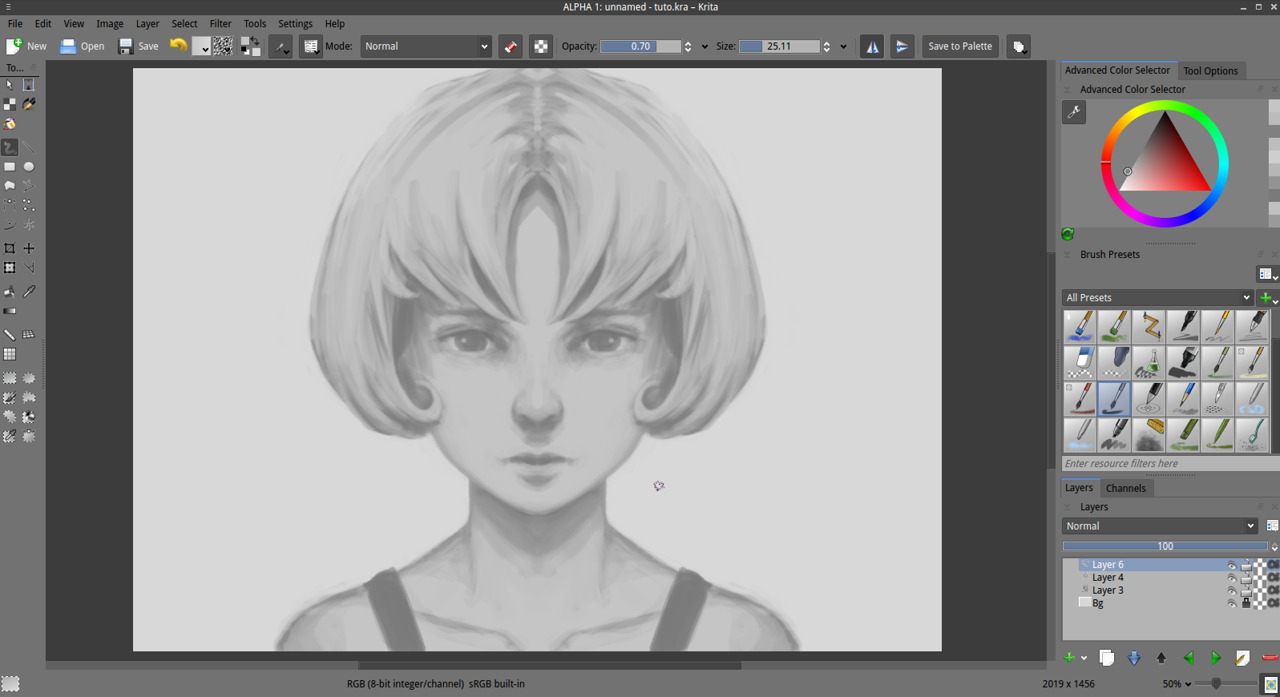
14. Create a new paint layer. With white and same brush but now 0.50 opacity paint now only the glossy parts of the face, and the hair : or the more smooth or greasy part ( or the area receiving naturally more light in this lighting setup ). Be also subtle here too.

15. Create a new paint layer. Add some definition and details with a hard thin brush as the default brush preset 'Layout_Oval' and start to bring harder details to your drawing. Especially for glossy point or materials. You can add glossy reflective points of light with very bright values, almost or white. Shadows can be also creased a bit ; but I advice you to keep in a restricted range of values and avoid usage of darker tones. Also add some low opacity white around the silhouette to boost the contrast a bit.
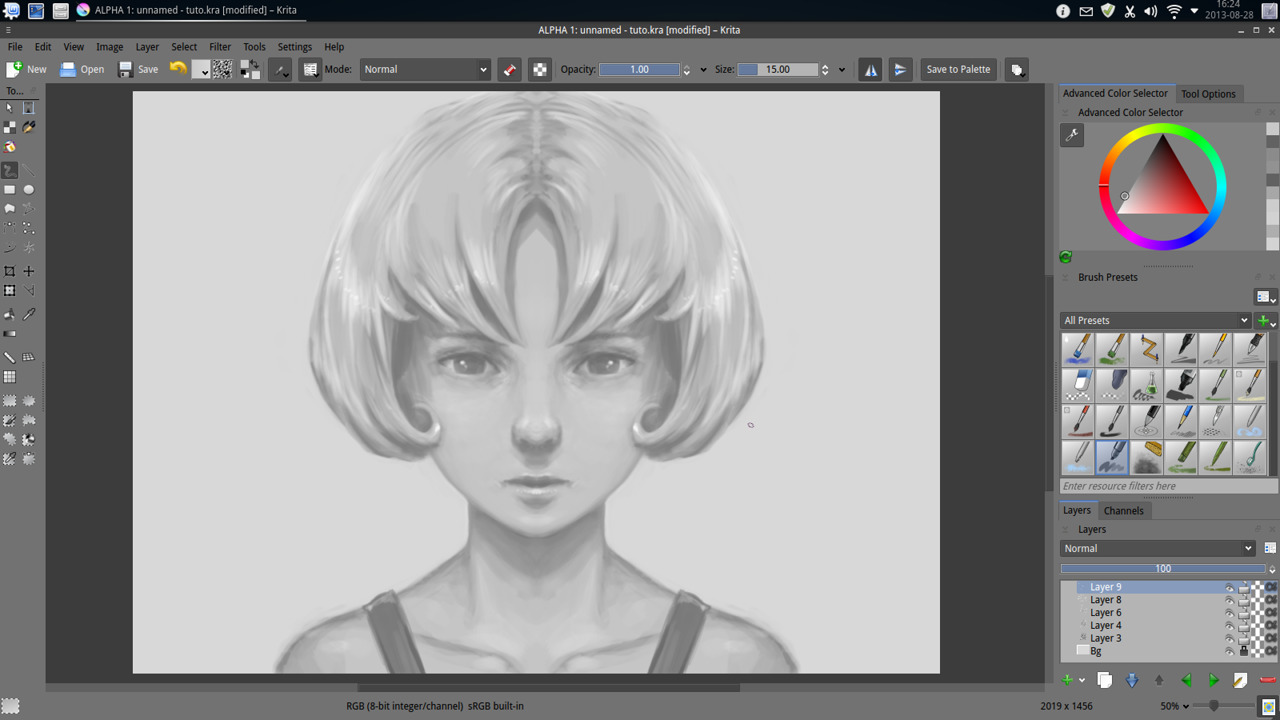
At the end , the young fictive person I drew from imagination look a bit mystic in her attitude and simplistic in the design. I'll not add more accessories or design to gears on her to keep the tutorial method clean , but feel free to keep painting and follow your imagination... I advice you to keep doodling with a standard viewport , 50% and without zooming ; and train your painting skill within a "compressed value space" ( from white to grey ). It's easier than to manage a limited range of grey than dealing with full blacks to white to get started.

This first part of this tutorial end here. Next part we will colorize it ! Go to the next part now
Repeat it again till you'll feel more confident with the steps to replicate without this page. Create monsters, girls, men or robot head this way with focusing on giving the illusion of volumes and the modeling/shading. The fun is really here : creation. Feel free to have a watch to my other mirrored portrait black and white speedpaintings .
A question ? Want to share the link of your results ? Discuss ? use the comments, I'll be around and participate too :-)
